Frozen-Themed Disney Day at Home: Easy Activities and Snacks for Kids
If you’re looking for a way to bring a little Disney magic home and your kids are fans of the movie Frozen, then a Frozen-themed Disney Day at Home might be just what you need.
Even as Annual Passholders, we sometimes have gaps between our Disney trips. During those in-between times, I like to find simple ways to keep my two kids, ages 5 and 2 ½, entertained while still incorporating some of their favorite Disney characters.
For this Frozen-themed day, my goal was to create easy activities and snacks using items that many families already have around the house. After just a few minutes of prep the night before, my kids had an entire day of Frozen-inspired fun that ended with a family movie night watching Frozen.
The best part? There were no expensive craft supplies, complicated recipes, or last-minute shopping trips required. In this post, I’ll share the activities we tested, including building Elsa’s Ice Castle, Olaf’s Snowball Games, a Frozen Toy Rescue, Elsa’s Ice Painting, and the Frozen-themed snacks we enjoyed along the way.
Indoor Activities
Build Elsa’s Ice Castle
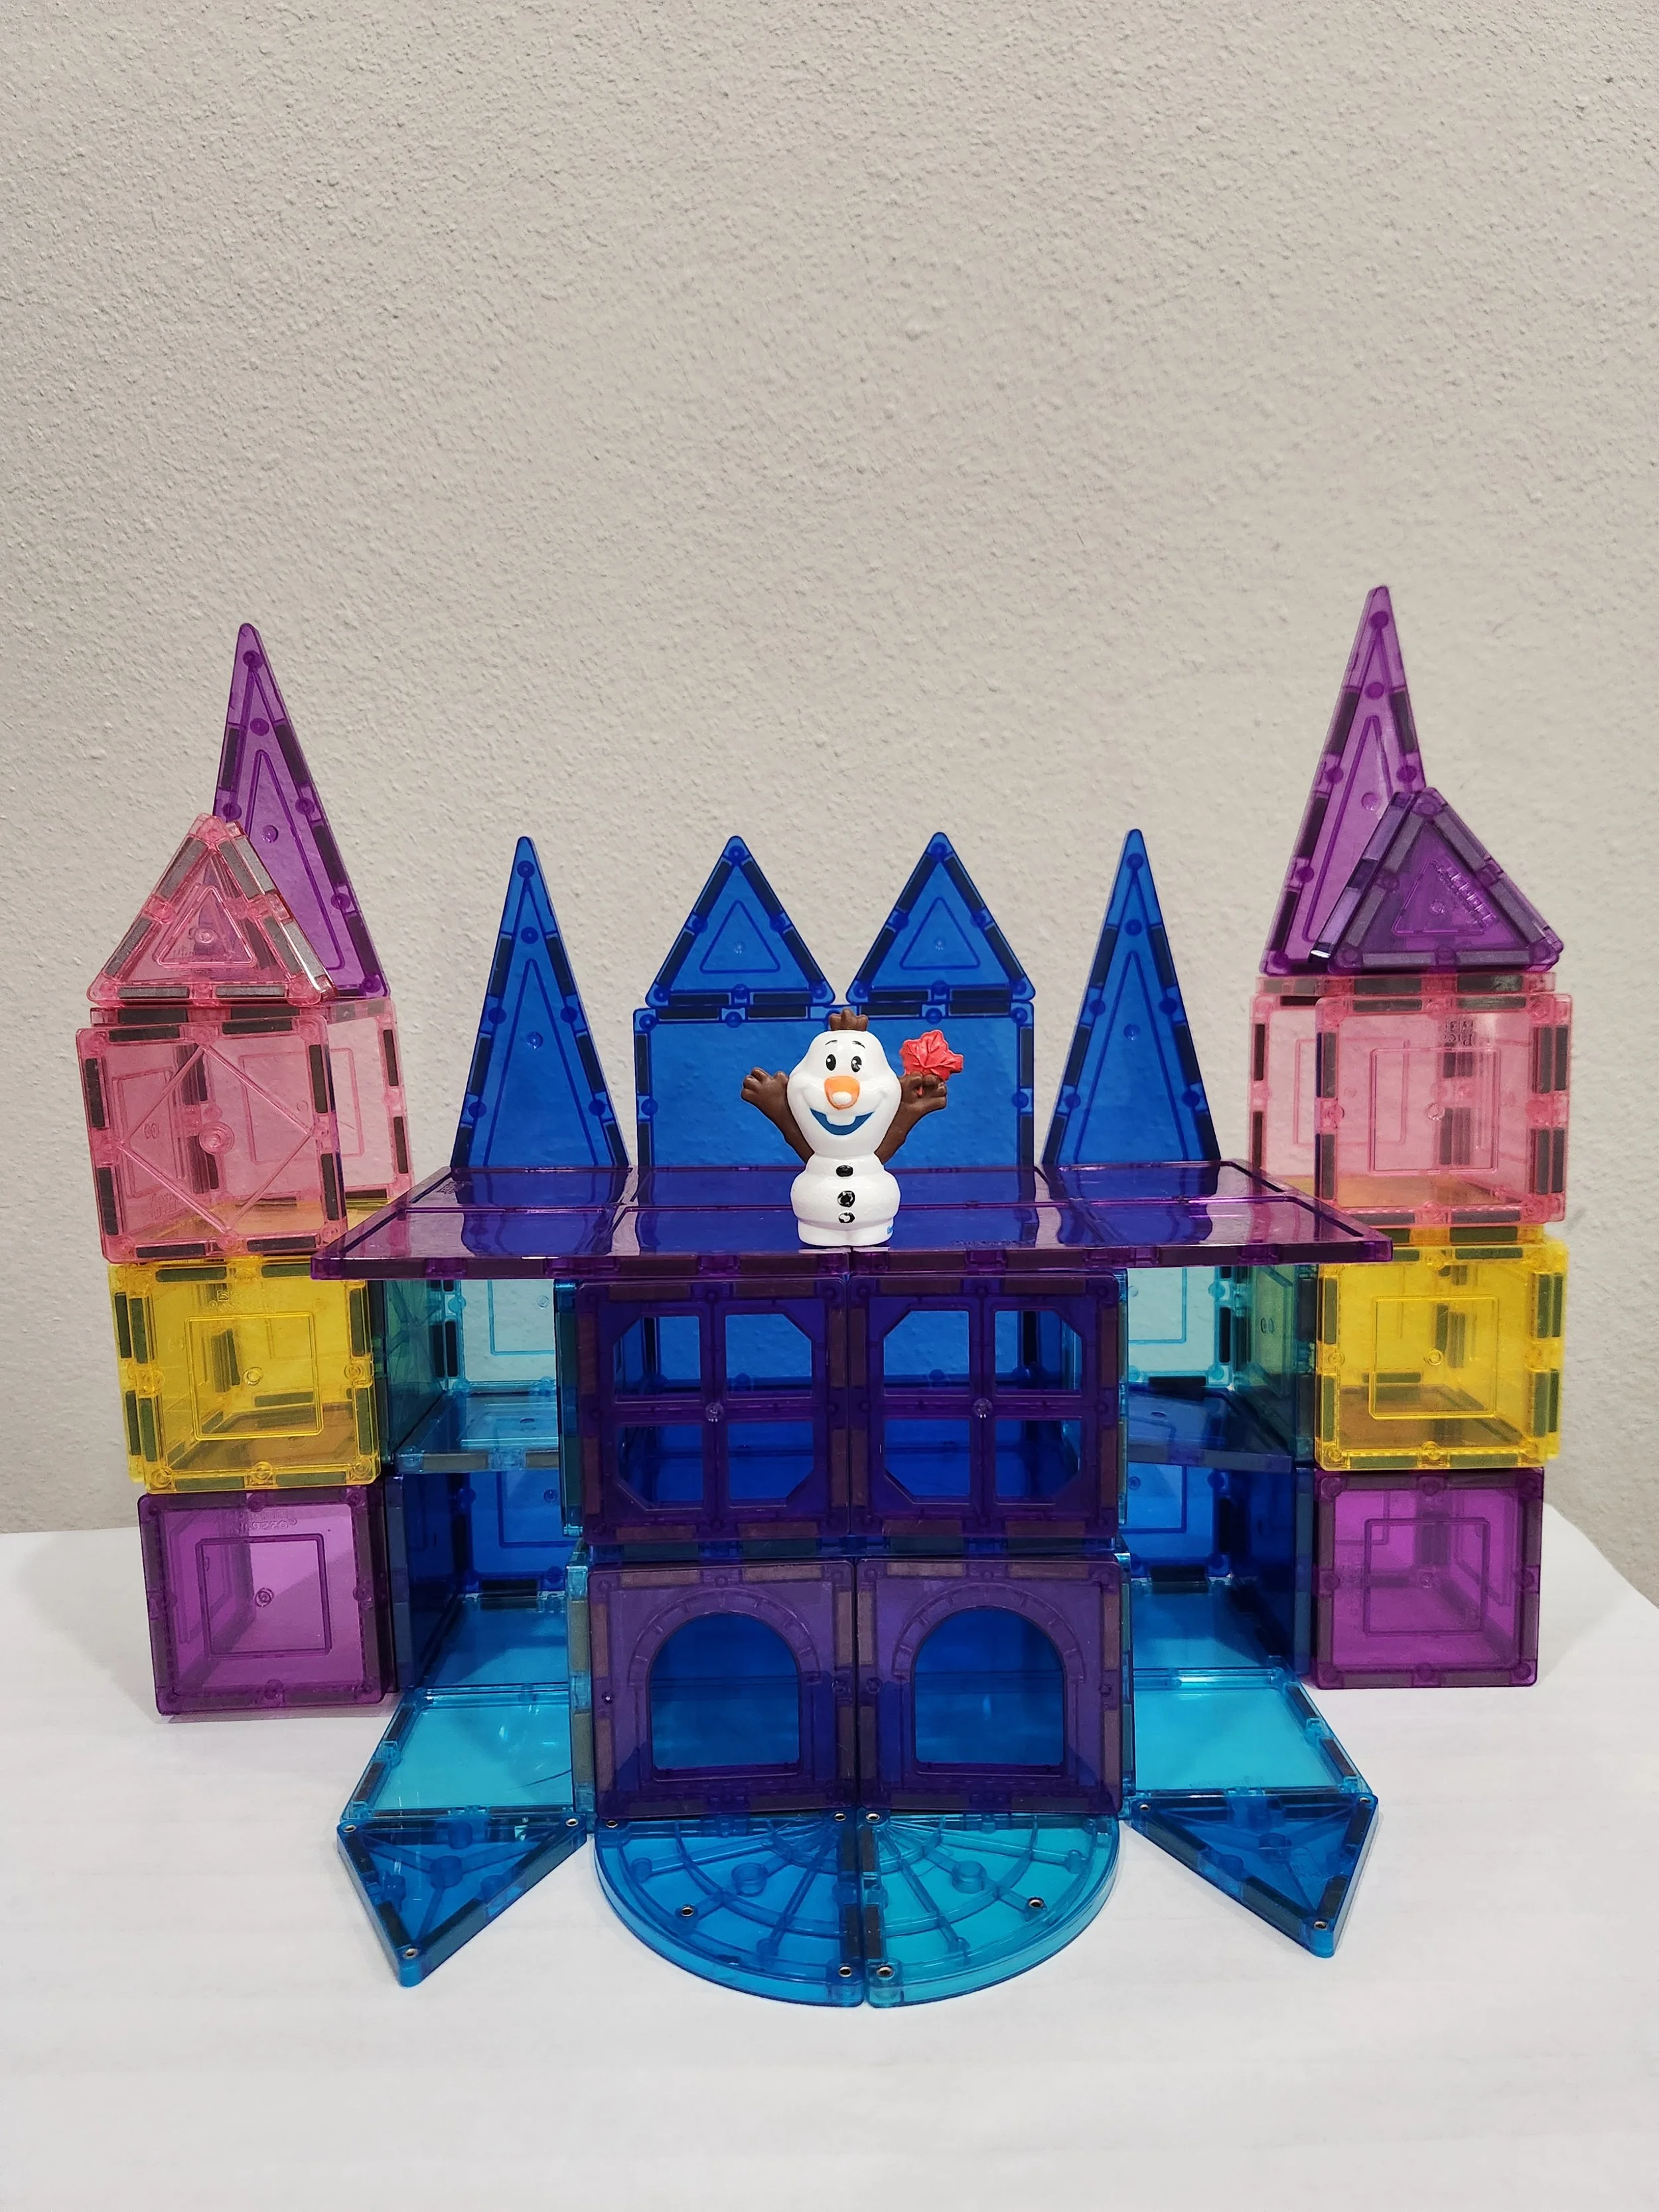
Supplies Needed:
Your favorite building toys
Prep Time: None
Play Time: About 1 hour
Cleanup: Minimal
What We Did:
I asked my kids to build their own ice castle just like Elsa does in the movie. For some added fun, you could also play the soundtrack from the movie in the background as they build. We used Magna-Tiles because that’s what we already had at home, but any building toys like Duplo blocks, LEGO, or wooden blocks would work. I set out their blocks, told them about the activity, and left the rest up to them.
Our Experience:
My kids love to build with any type of toy, so I was pretty confident they would enjoy this activity, and they did. For about an hour, they worked on building their castles, and once they were finished, we brought out a few of our Frozen character figures, who quickly moved into the castles. The activity naturally turned into pretend play as they continued creating their own Frozen adventures.
I think this is a great activity to start your Frozen-themed day with because it’s easy to set up and gives kids plenty of room to be creative. It also worked surprisingly well despite the age gap between my kids. My older son was more focused on building an elaborate ice castle, while my younger son bounced between creating his own designs and checking on what his brother was building. Even though they approached the activity differently, they both found their own way to enjoy it.
Olaf’s Snowball Games
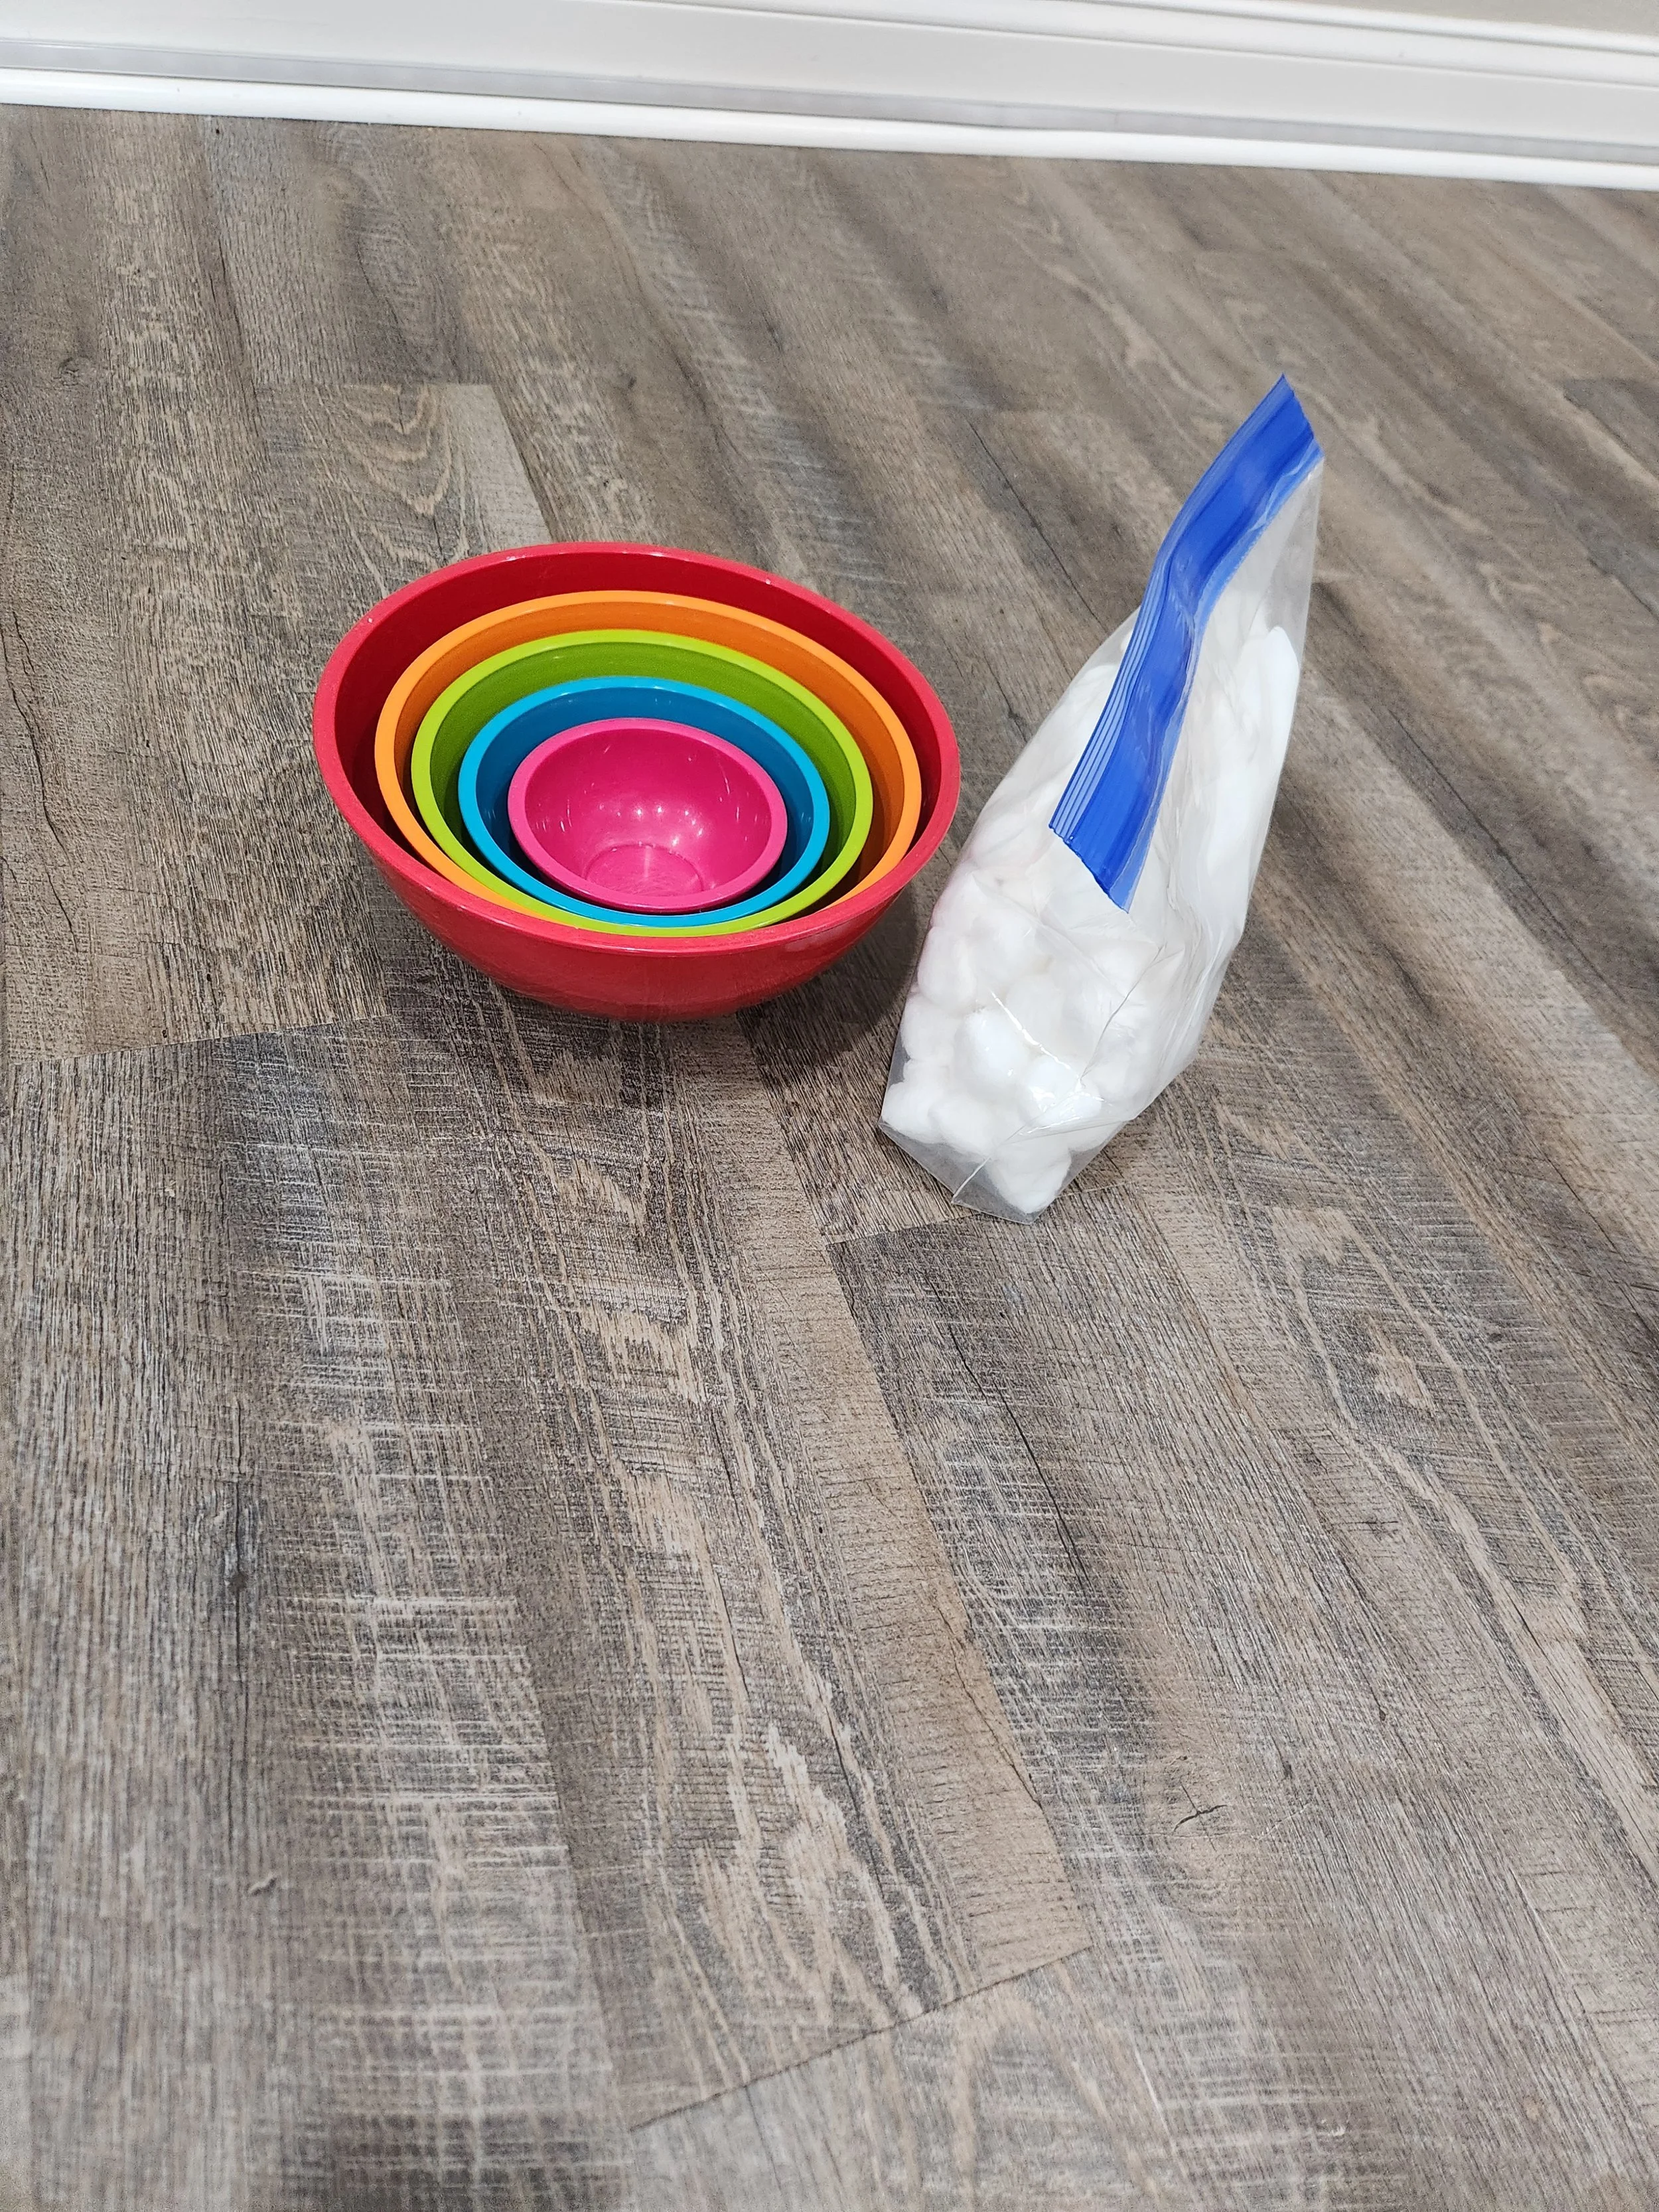
Supplies Needed:
Cotton balls
Different sized bowls
Don’t Have These? Try:
Rolled-up socks
Balls of paper
Laundry baskets
Plastic bins
Prep Time: None
Play Time: About 1 hour
Cleanup: Minimal
What We Did:
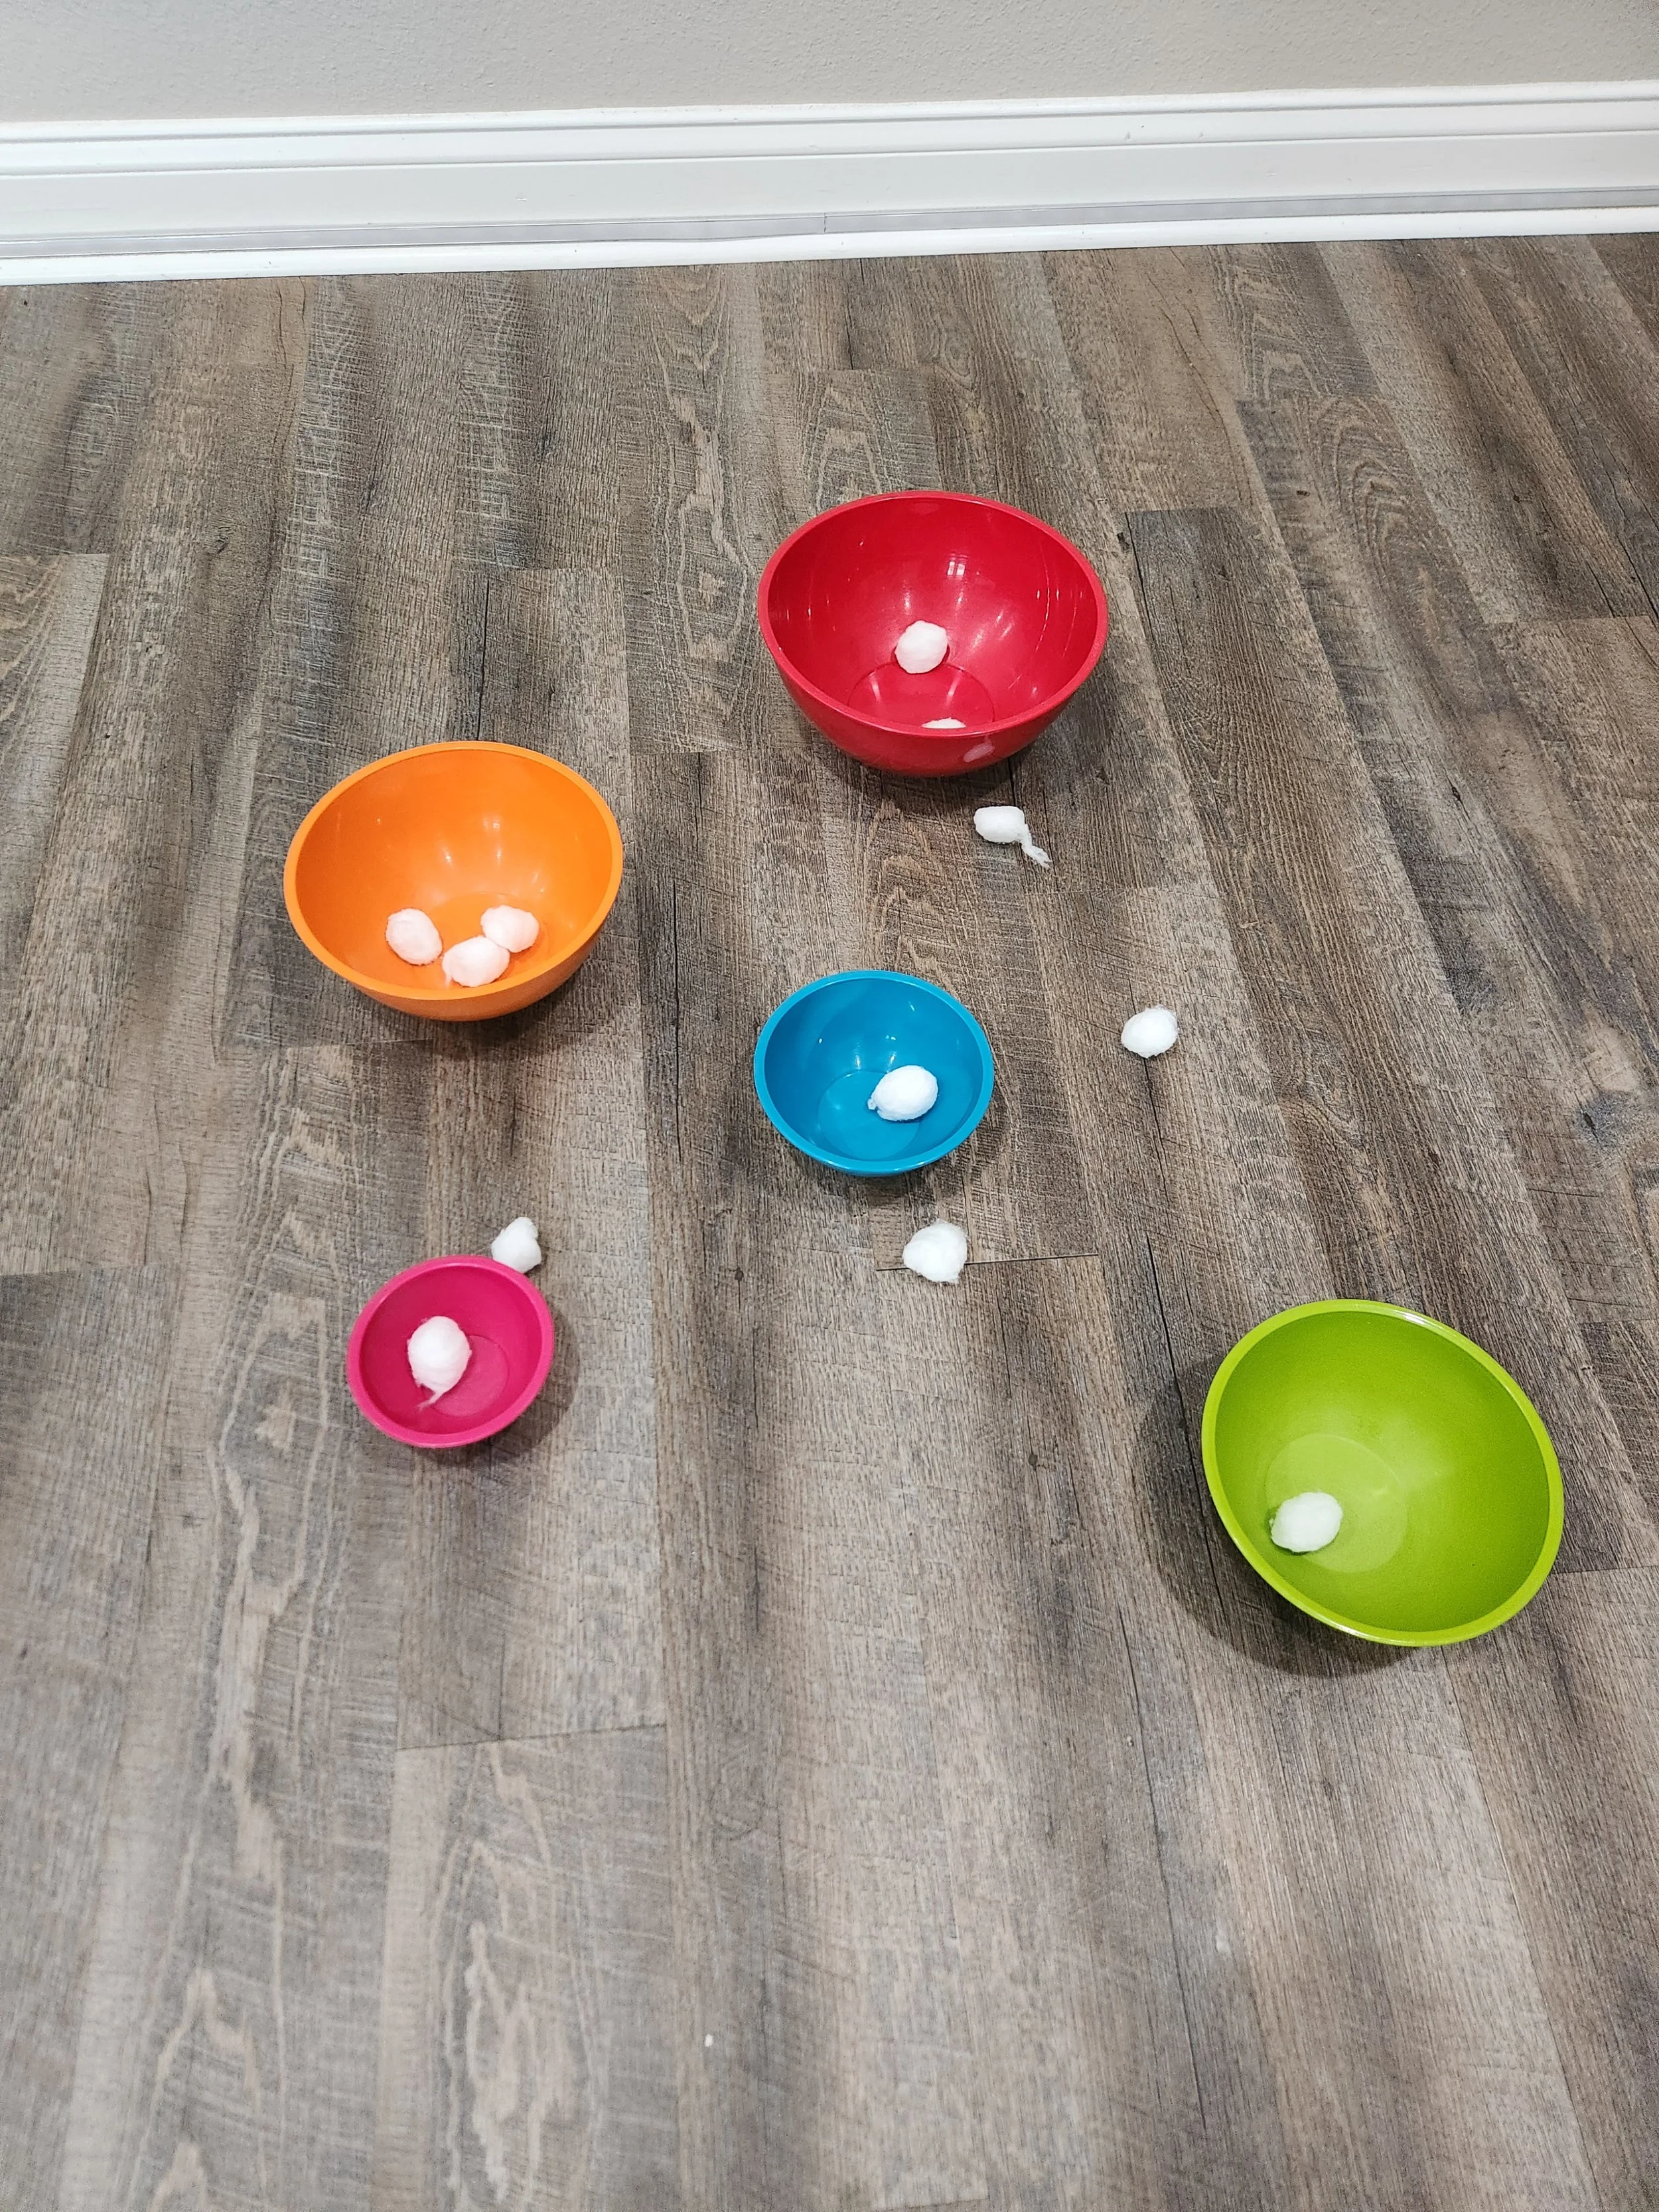
For this activity, I used cotton balls as Olaf-inspired snowballs and set out several different sized mixing bowls on the living room floor. The idea was simple: toss the snowballs into the bowls and see how many you could make. You could even assign different point values to each bowl based on size if you want to turn it into a game.
If you don’t have cotton balls, rolled-up socks or balls of paper would work just as well. Likewise, laundry baskets, plastic bins, or cardboard boxes can easily be substituted for the bowls. Once everything was set up, I gave my kids the snowballs and let them take it from there.
Our Experience:
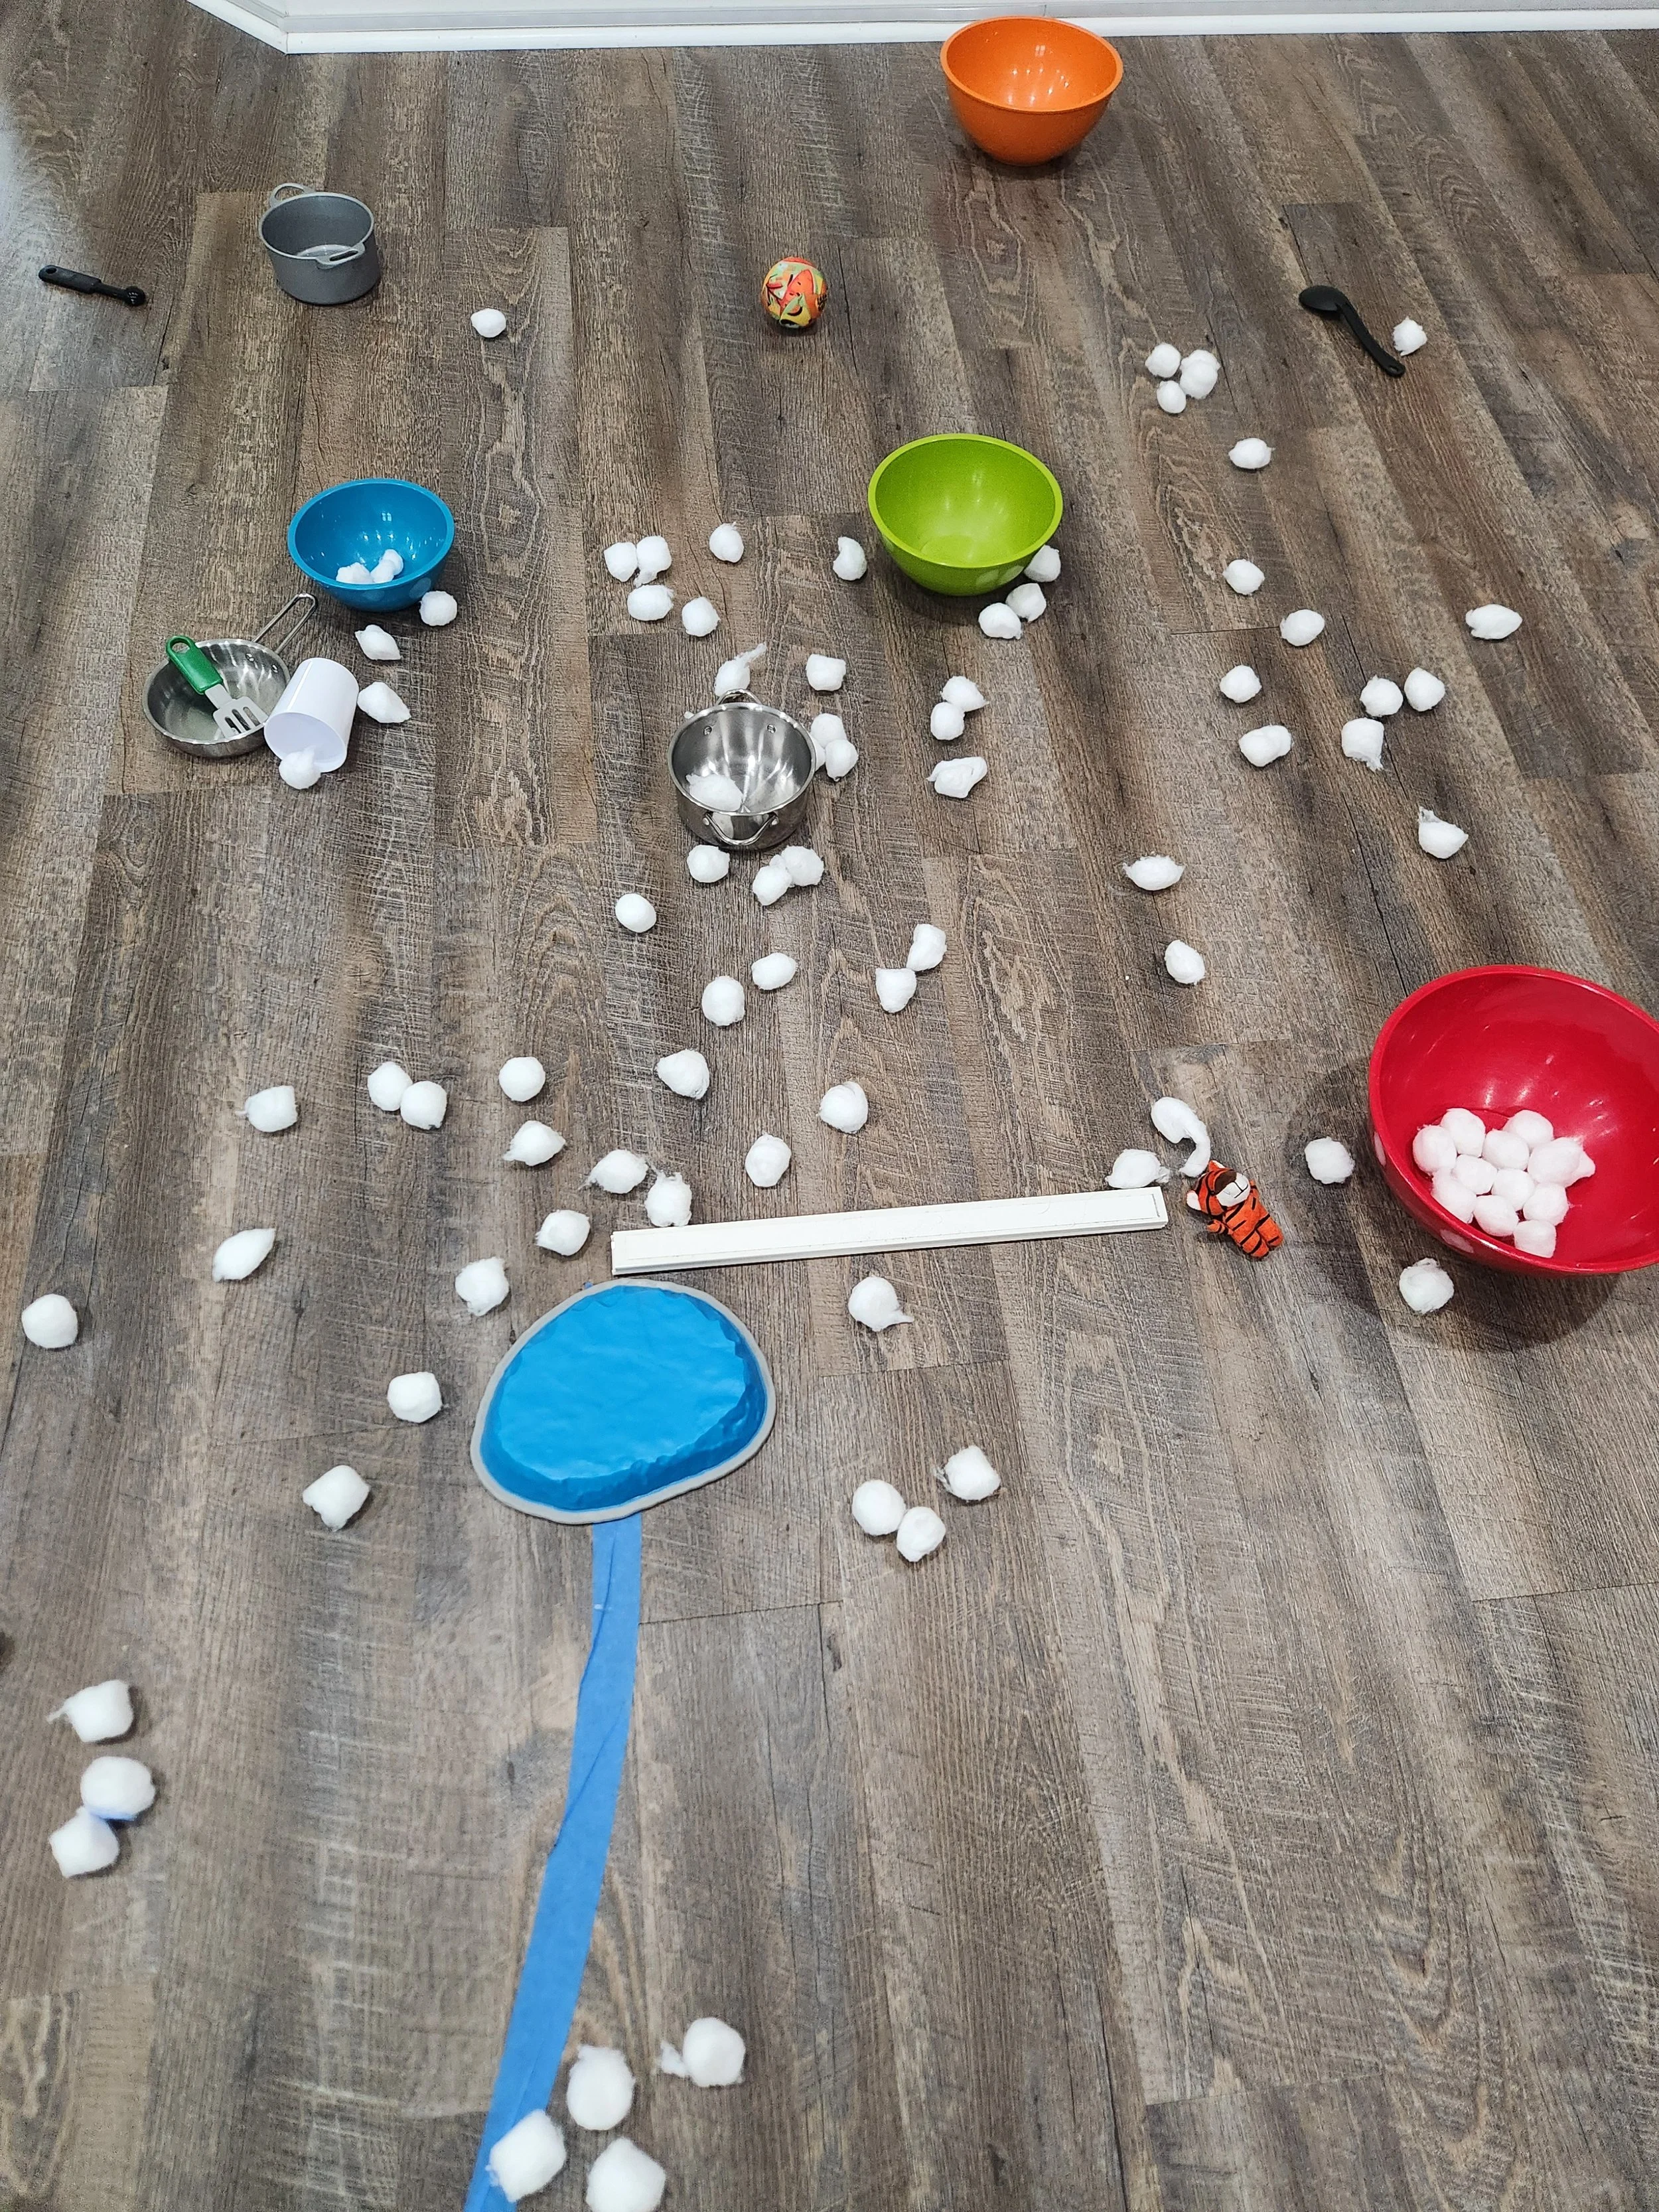
The overwhelming success of this activity surprised me. They both enjoyed tossing the “snowballs” into the bowls. After a few minutes, they started creating their own games using the cotton balls and other items we already had around the house.
I put a piece of painter’s tape on the floor, gave them a spoon, and they turned it into a relay race where they carried snowballs from one side of the room to the other. We have foam climbing blocks that they used to create snowball races down a slope. We grabbed pots and pans from their pretend kitchen, and my younger son really loved pretending to cook with the snowballs and transferring them between different bowls. At one point, we even ended up having a snowball fight.
What I loved most about this activity was watching my kids take my original idea, and use it to come up with their own activities. What started as a simple snowball toss, quickly turned into a whole series of Olaf-inspired snowball games that we hadn’t planned out in advance. It was so much fun watching them come up with their own ideas, and the fact that they played with a bag of cotton balls for nearly an hour makes this one of my favorite activities from our Frozen-themed day at home.
Outdoor Activities
Frozen Toy Rescue
Supplies Needed:
Small toys
Water
Container/bowl
Spoons
Spray bottle(optional)
Prep Time: About 2 minutes, plus freezing time overnight
Play Time: About 25 minutes
Cleanup: Minimal
Safety Note: Adult supervision is recommended for this activity. We used warm water and spoons to help melt the ice. Avoid using sharp tools or striking the ice, especially with younger children.
What We Did:
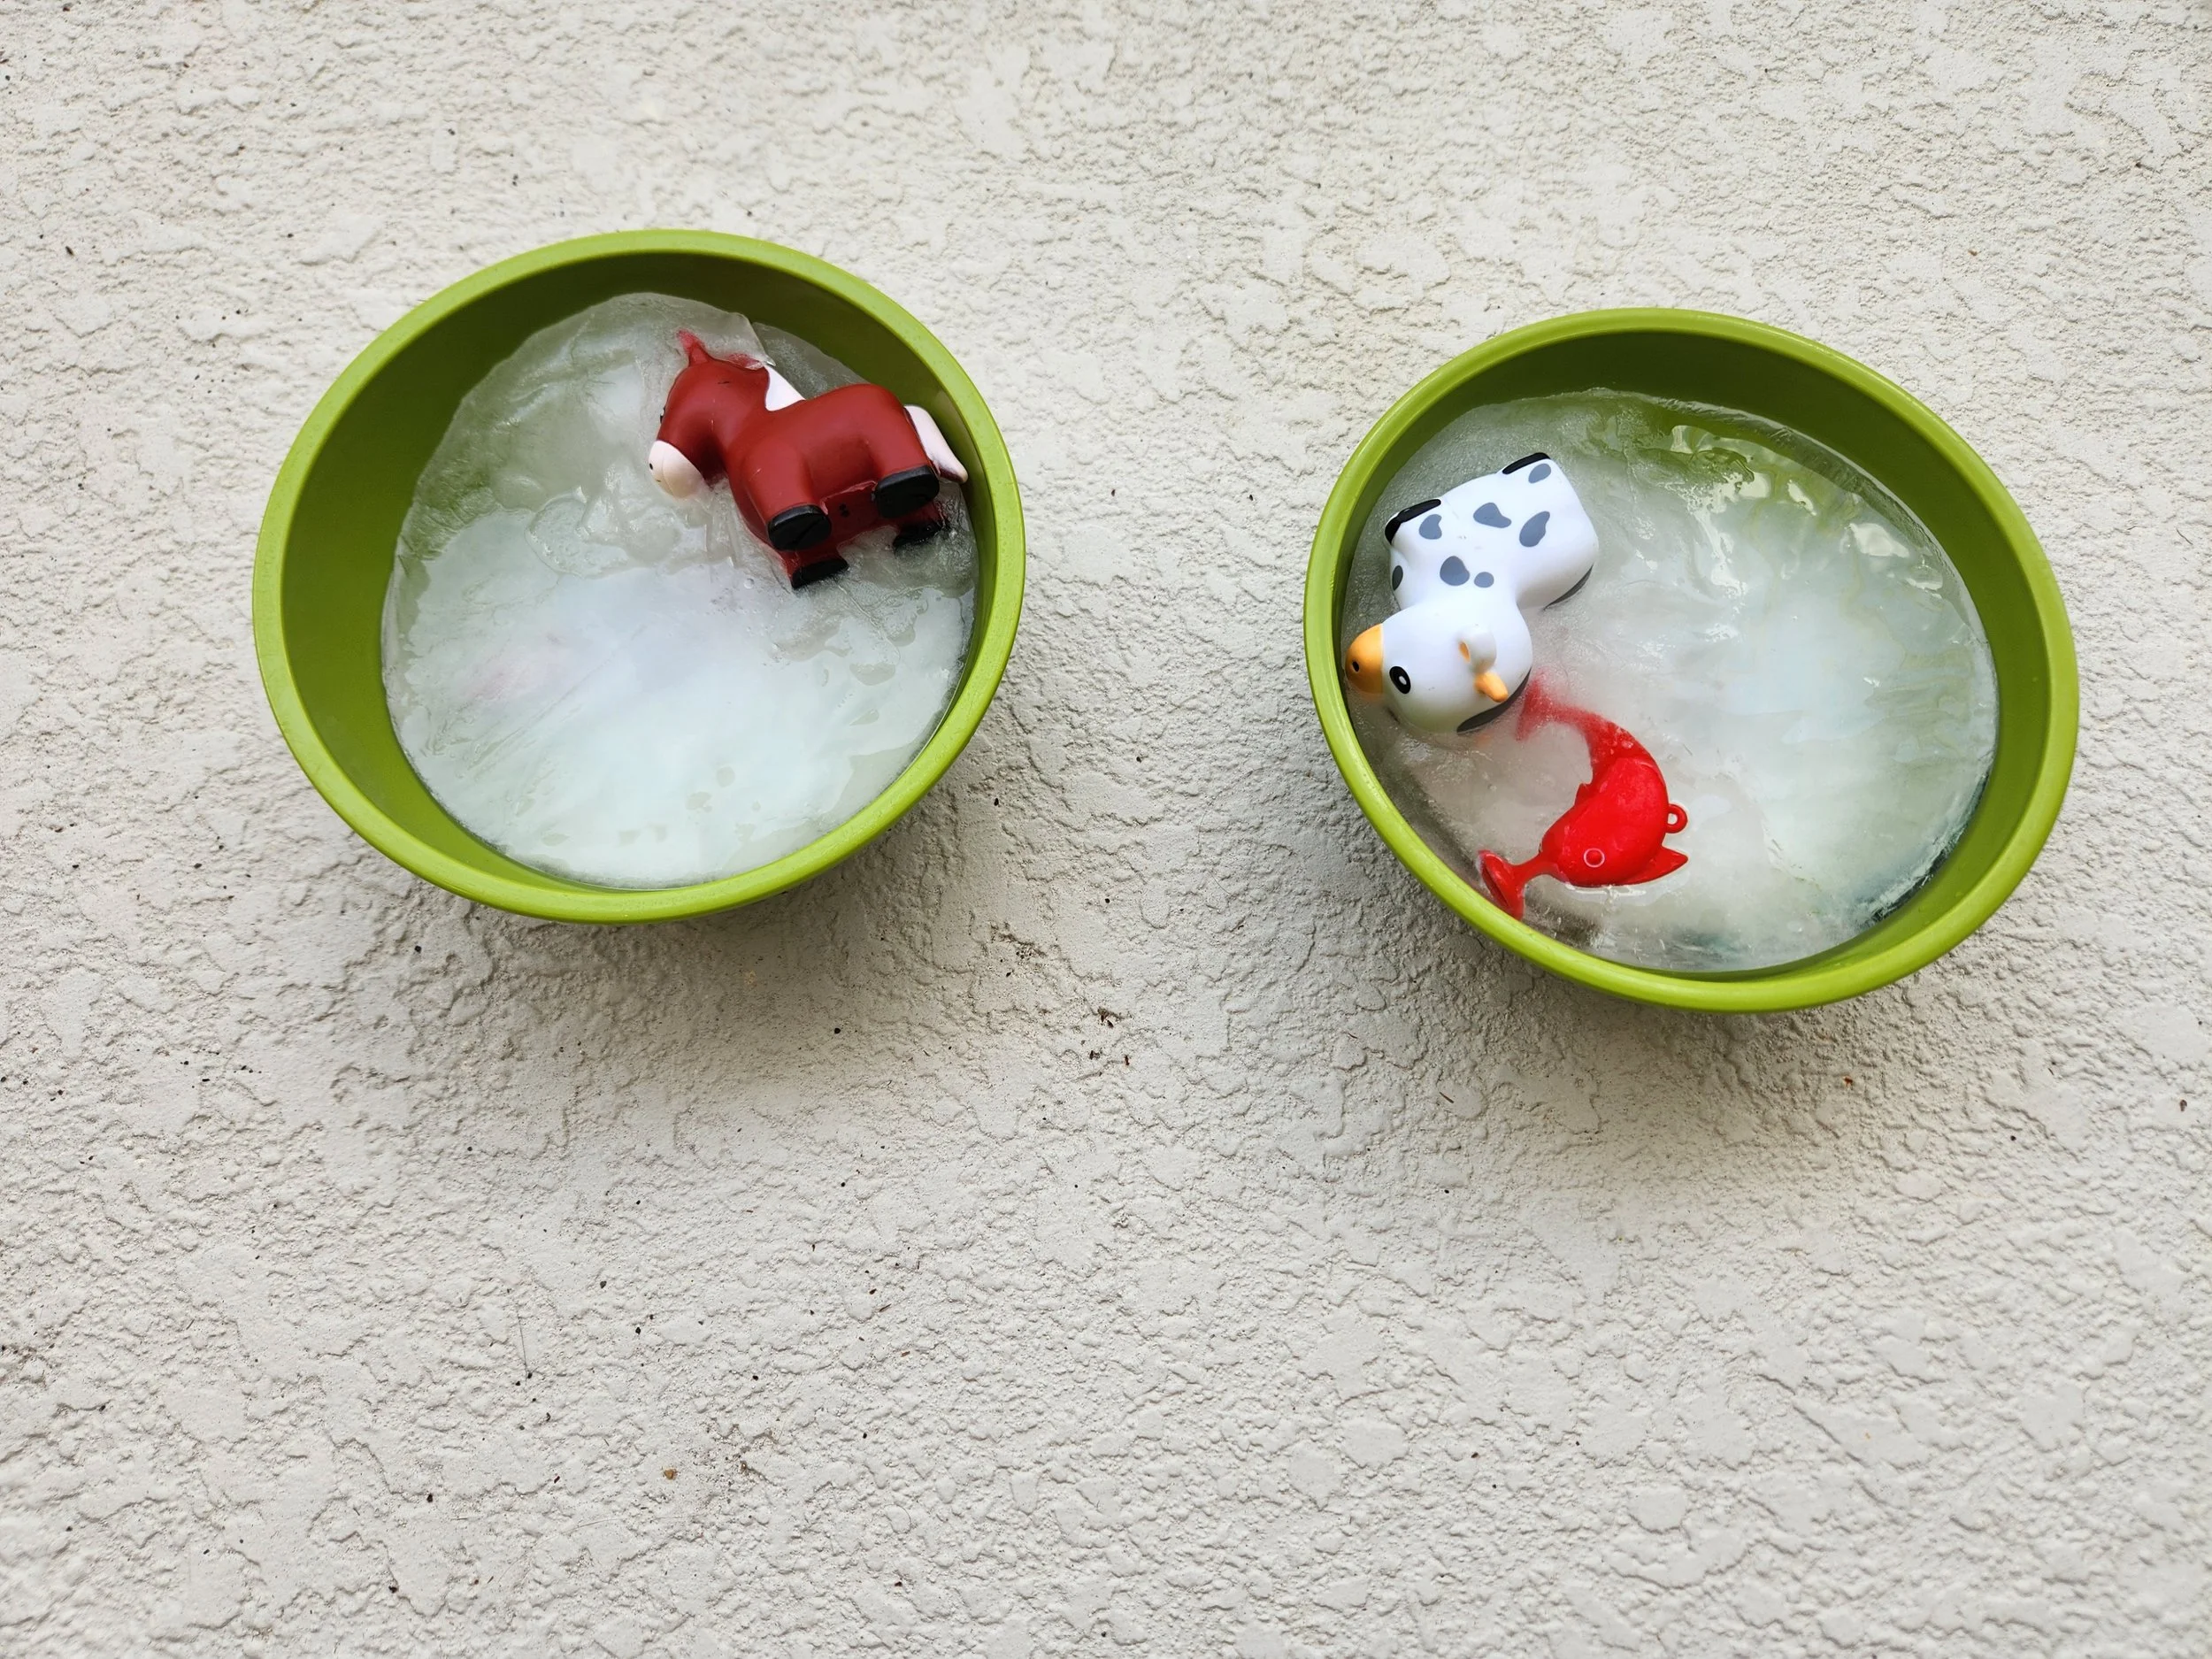
The night before our Frozen-themed Disney Day, I gathered a few small waterproof toys and two bowls. I placed the toys inside the bowls, filled them with water, and put everything into the freezer overnight. The next day, I took the bowls out a few minutes before we were ready to start playing to make it easier to remove the frozen blocks of ice.
We headed outside for this activity, and I gave each of my kids a cup of warm water and a spoon. Their mission was simple: rescue the toys that had been frozen inside the ice.
Our Experience:
Using two smaller bowls worked out really well for us. Each one of my kids had their own ice block to work on and the same number of toys to rescue. Once we brought the ice outside, it started melting fairly quickly, and the warm water helped speed up the process. Before long, they were pouring water over the ice, dropping it to crack it apart, and digging out the toys with their spoons.
This ended up being the biggest hit of our entire Frozen-themed day. What surprised me most was that rescuing toys was only part of the fun. Once the toys were free, my kids spent even more time playing with the ice, water, and toys together. If I were doing this again, I’d probably make a few extra ice blocks because they enjoyed it so much.
While you could certainly do this activity indoors using a large container or bin to catch the water, I think it works best outside where cleanup is practically nonexistent. Once the ice melts, you’re really only left with a little water.
Frozen Ice Painting
Supplies Needed:
Small paper cups
Popsicle sticks
Water
Cardboard
Washable paint (optional)
Don’t Have These? Try:
Ice cube tray
Silicone cupcake liners
Plastic spoons
Paper
Prep Time: About 2 minutes, plus freezing time overnight
Play Time: About 5 minutes for painting, much longer for playing with ice
Cleanup: Minimal
What We Did:
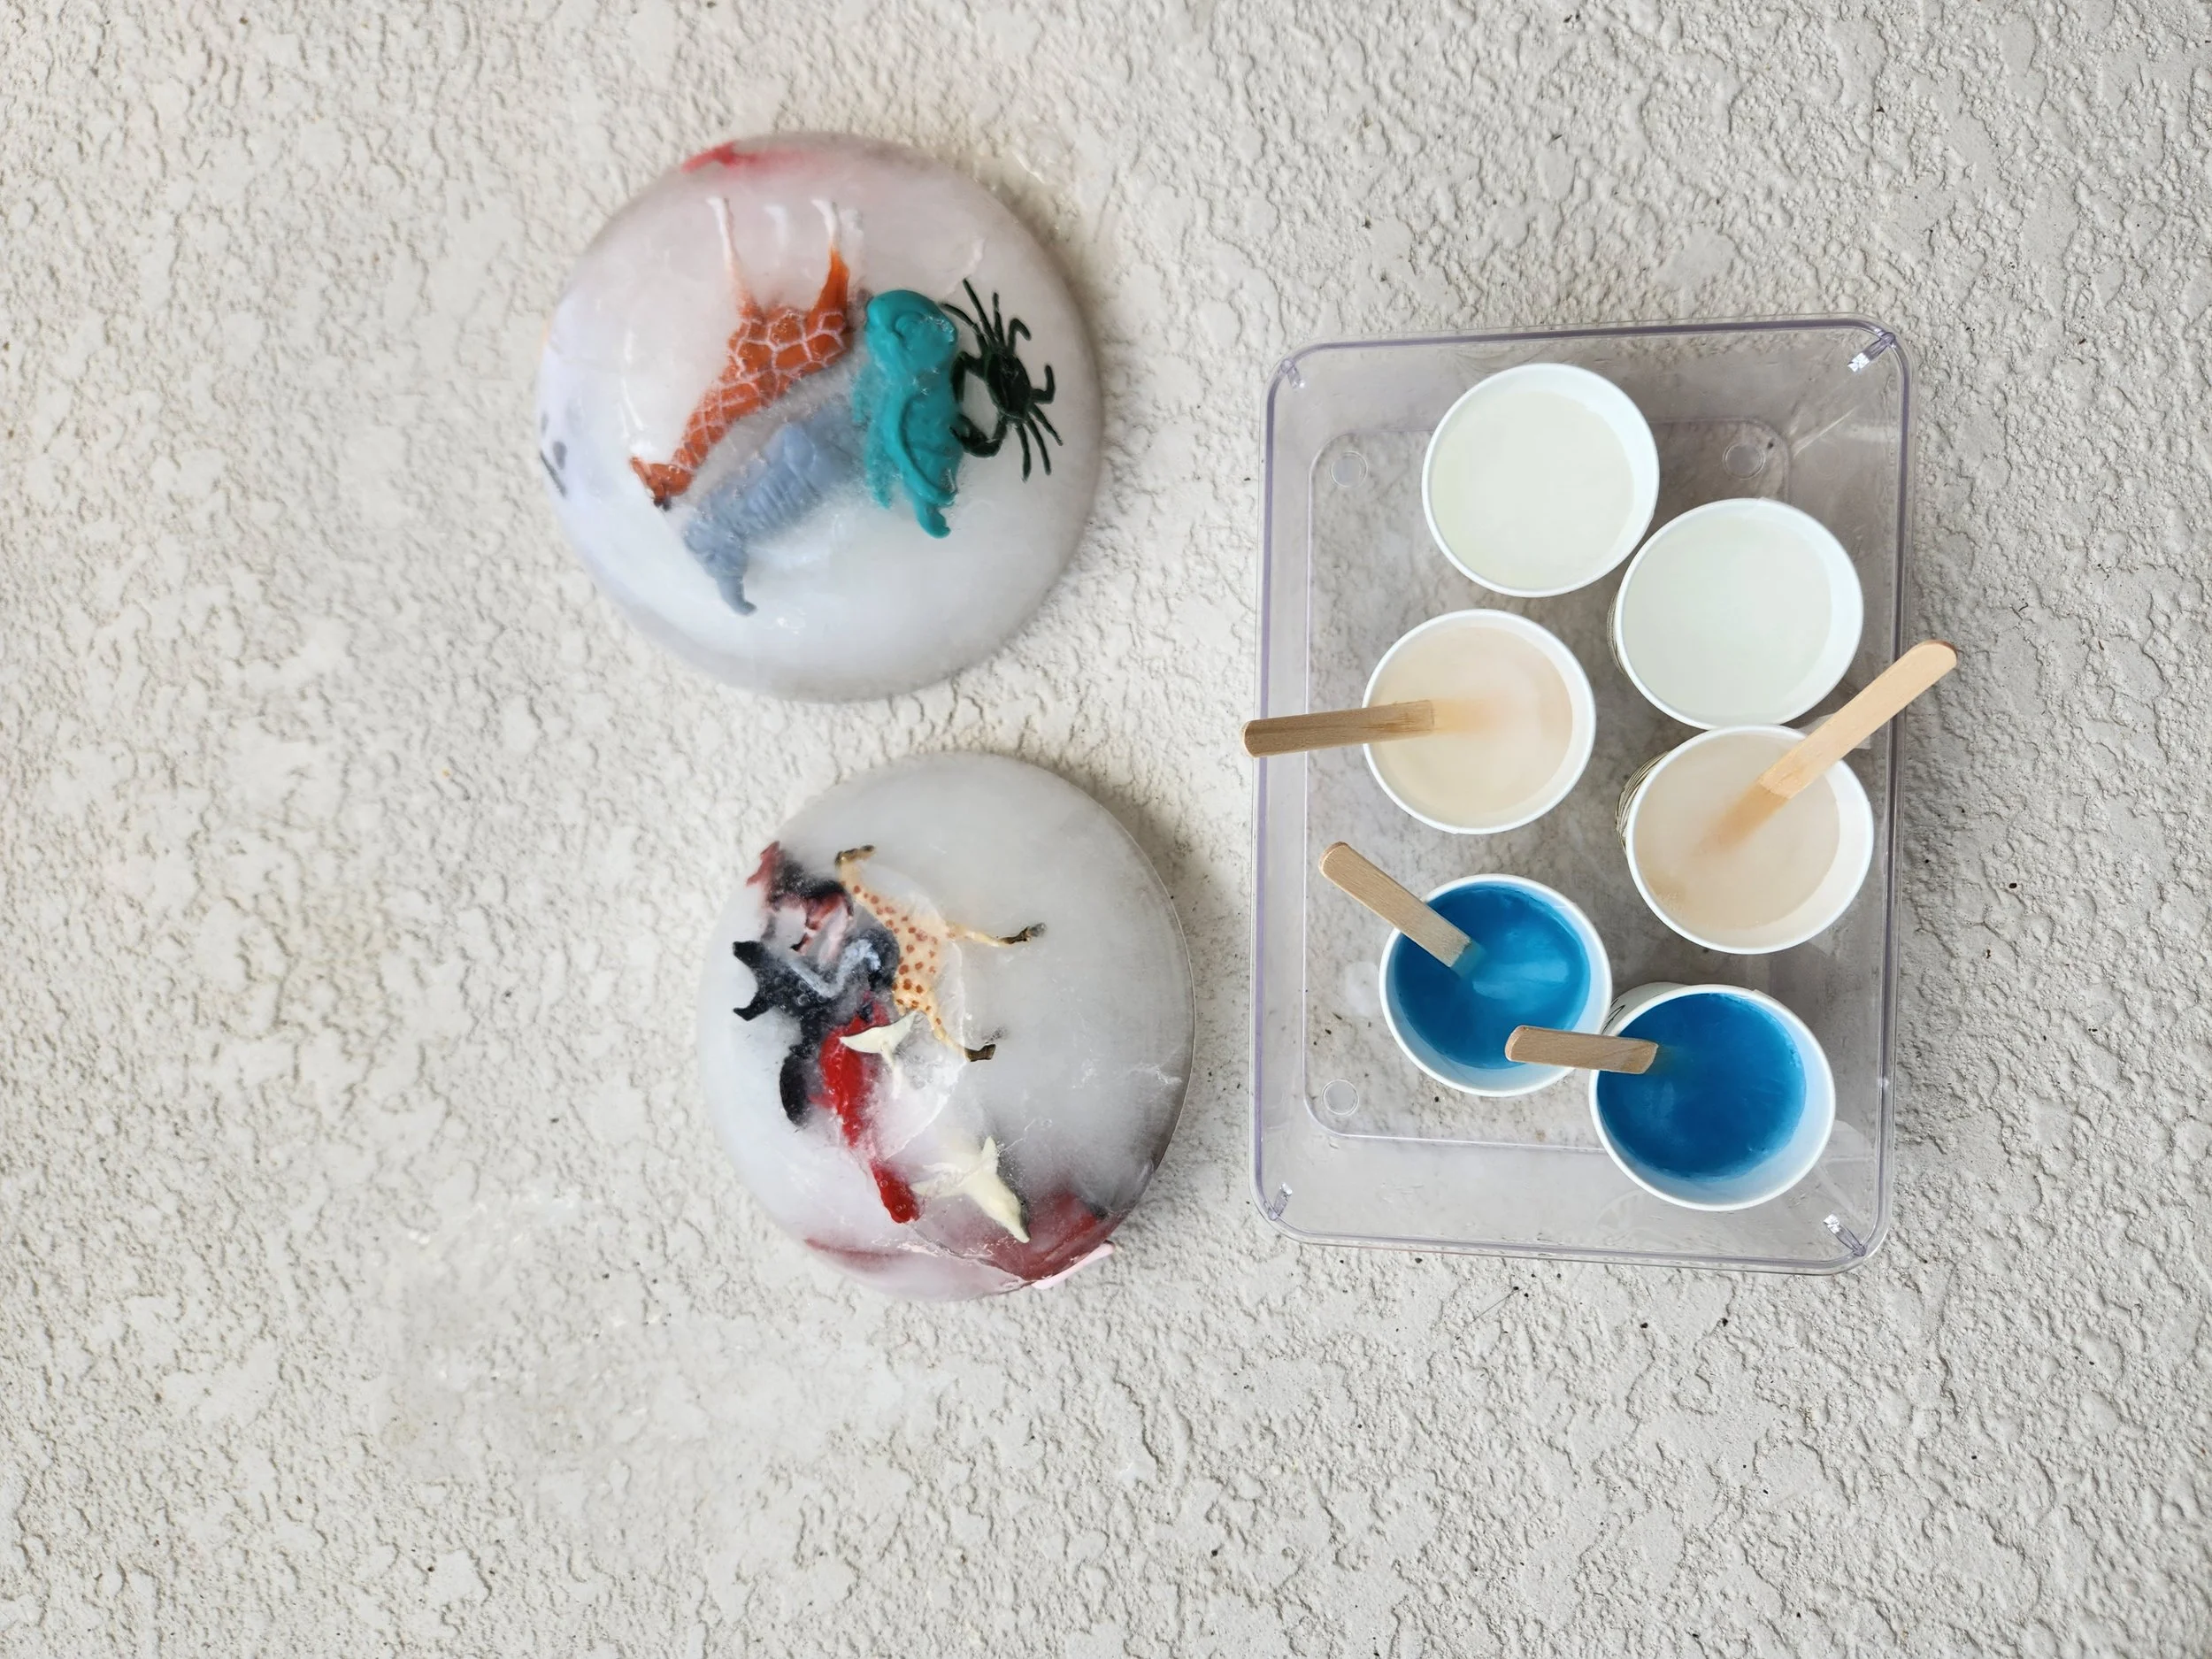
Just like with the Frozen Toy Rescue, I prepped this activity the night before. I grabbed six small paper cups, water, washable blue paint, and popsicle sticks. I added a small amount of paint to the bottom of a few of the cups, filled them all with water, and placed a popsicle stick into four of them. I left the other cups without sticks because I wanted to see which version worked better for little hands.
The next day, I peeled away the paper cups, took the ice outside, and used a flattened cardboard box as our canvas. The idea was for my kids to “paint” with the melting ice and see what kinds of designs they could make.
Our Experience:
Honestly, my kids didn’t enjoy the painting portion of this activity as much as I expected. The ice blocks without a stick were too cold for them to hold comfortably, so I would definitely recommend freezing a popsicle stick or plastic spoon into each one. It’s also possible I didn’t use enough paint because the colors weren’t showing up very well on the cardboard.
After a few minutes of trying to paint, they decided the ice itself was much more fun than the art was.
We have a water table nearby, and they ended up filling it with water and playing with the ice instead. They even asked me to bring out a bowl of regular ice cubes so they could continue playing. In our case, playing with ice lasted much longer than the painting activity.
While this wasn’t one of the biggest hits from our Frozen-themed day, I still wanted to include it because other kids may enjoy it more than mine did. For our family, the takeaway was that ice cubes, water, and a few toys created a much more successful sensory play activity than the painting portion itself.
Frozen-Inspired Snacks
Arendelle Ice Pops

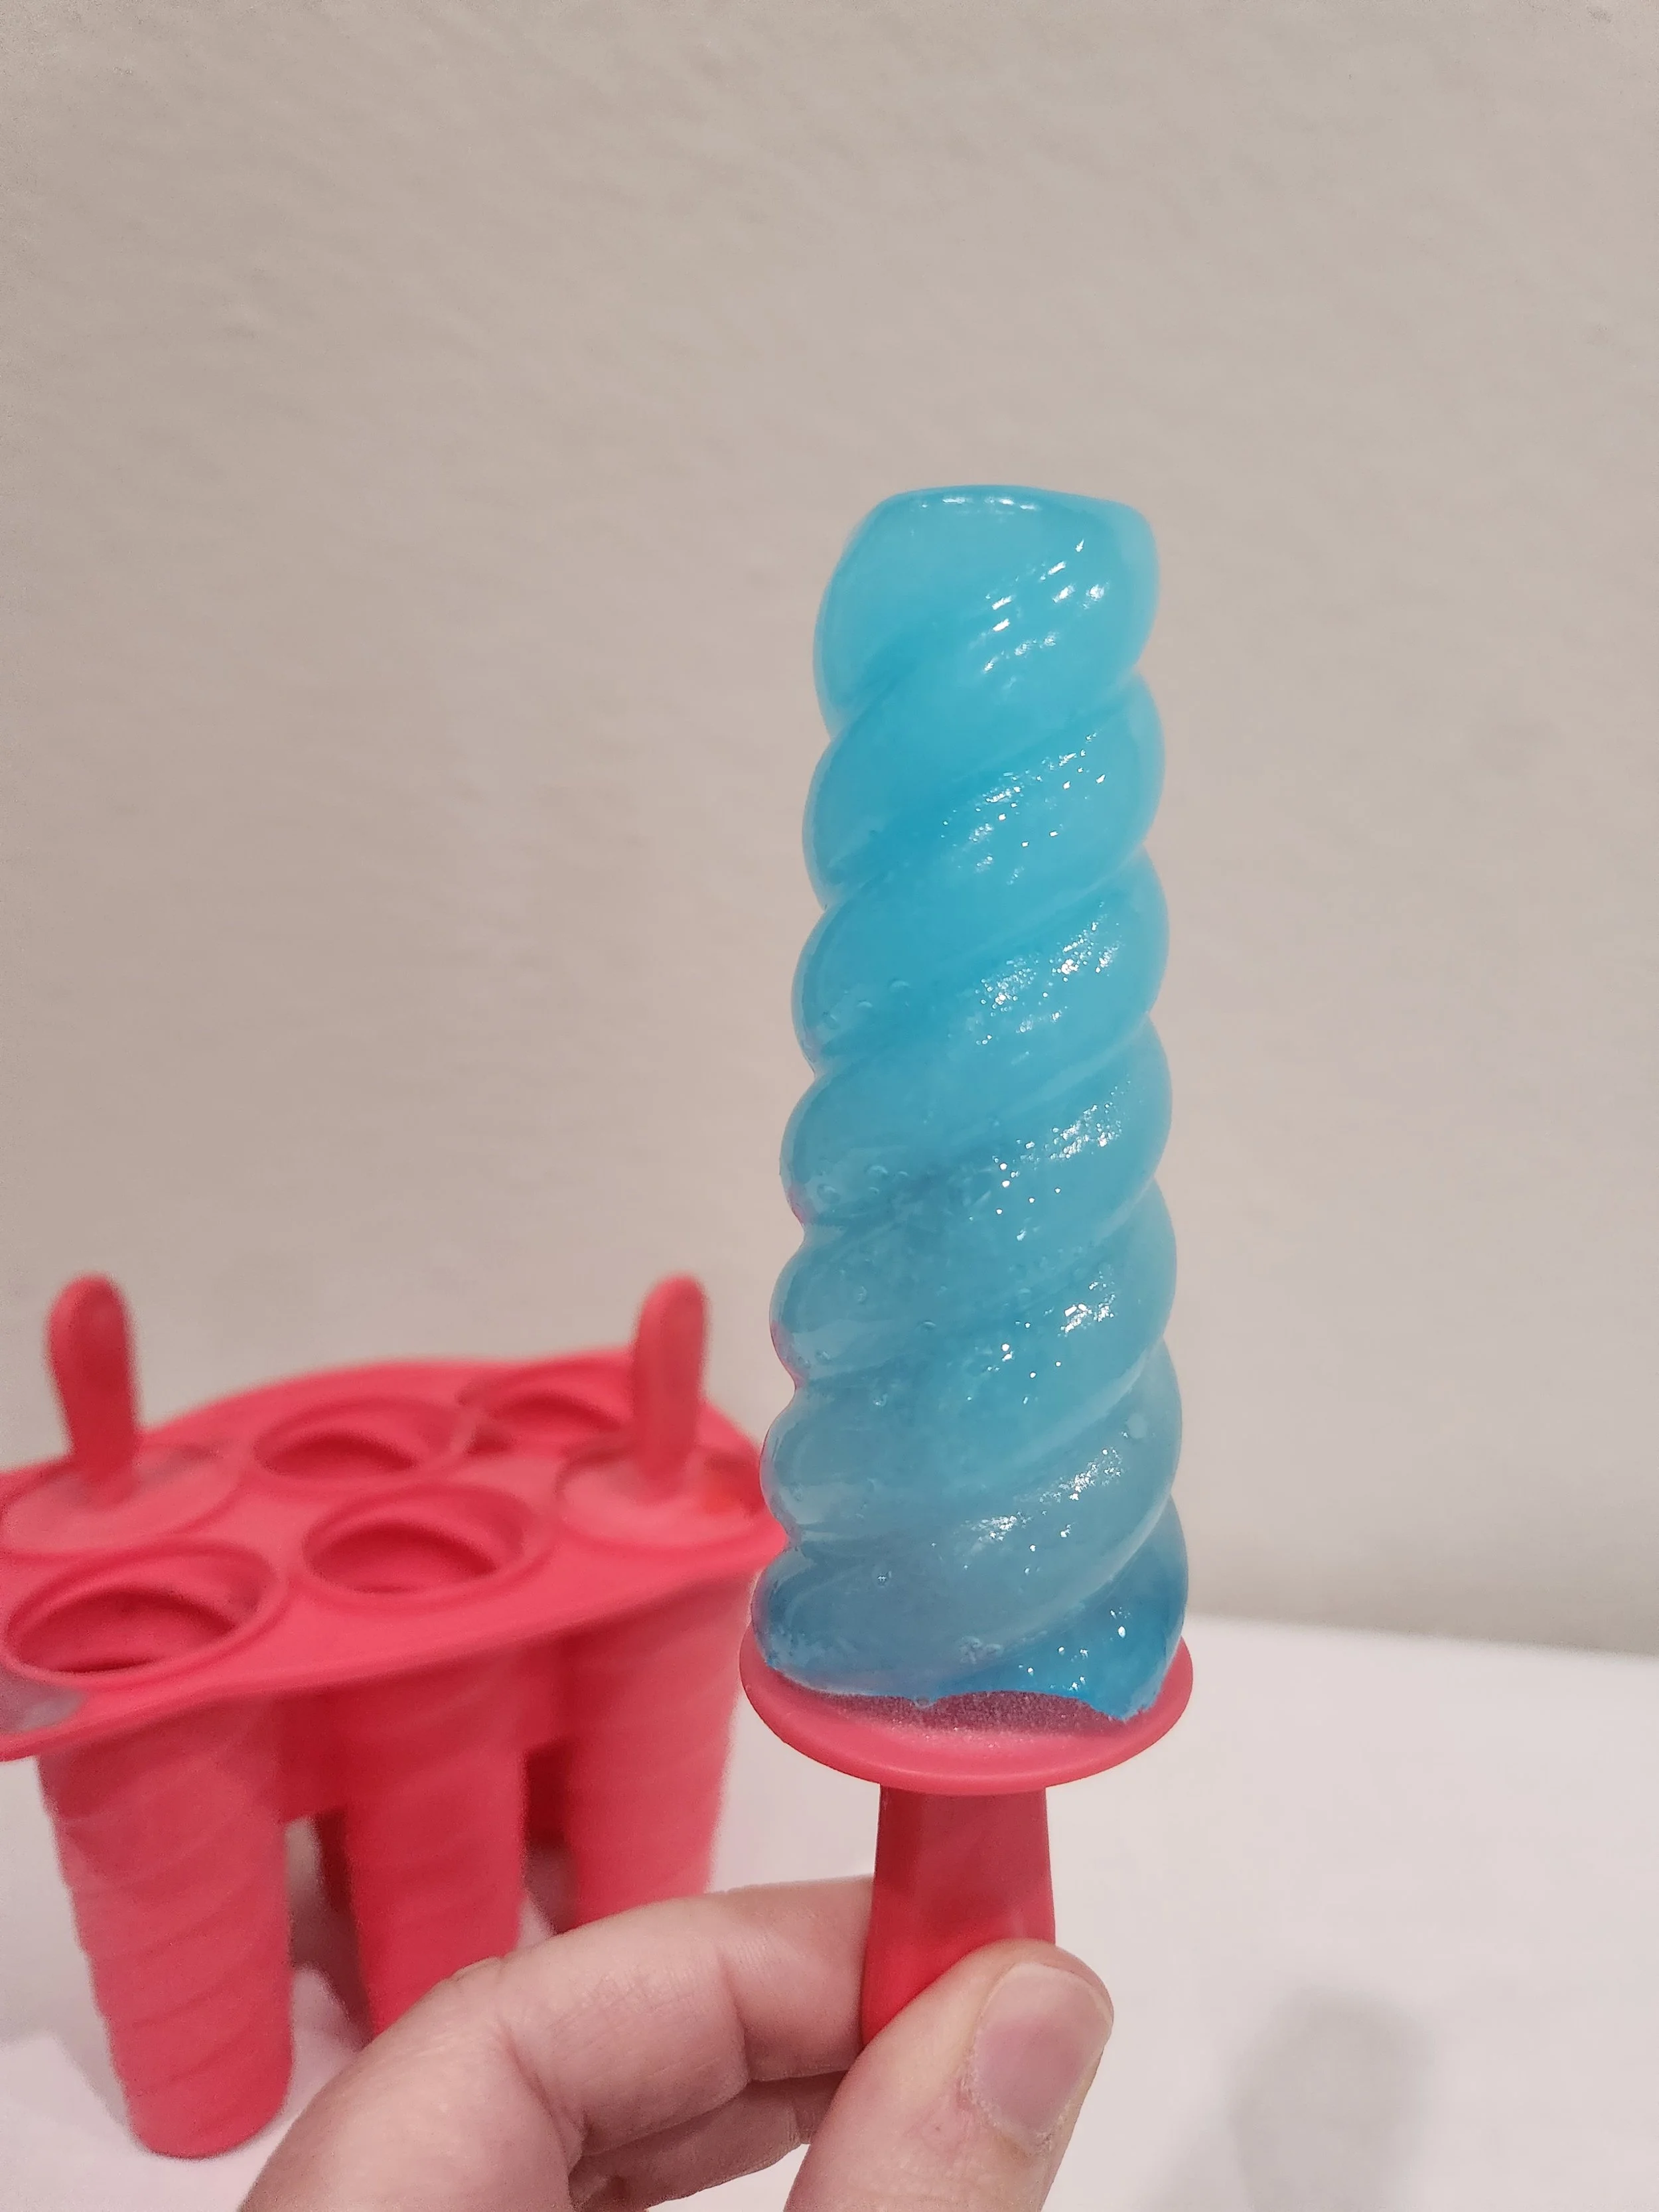
Supplies Needed:
Blue sports drink, juice, or another drink your kids enjoy
Popsicle mold
Don’t Have These? Try:
Paper cups
Silicone cupcake liners
Ice cube tray
Prep Time: About 2 minutes, plus freezing time overnight
Directions:
The night before your Frozen-inspired Disney Day at Home, pour your favorite blue sports drink, juice, or other drink into a popsicle mold and freeze overnight. The next day, they’re ready to enjoy as a cool Frozen-inspired treat.
Our Experience:
My older son helped me pour the drink into the molds, and it was one of the first things he asked about the next morning. He was very excited to see if the popsicles were ready and couldn’t wait to try them.
They may be simple to make, but they were a big hit with the kids and a fun addition to our Frozen-themed day. They also made a great cool-down treat after spending time outside playing with the Frozen Toy Rescue activity.
Sven’s Snowy Snack Mix
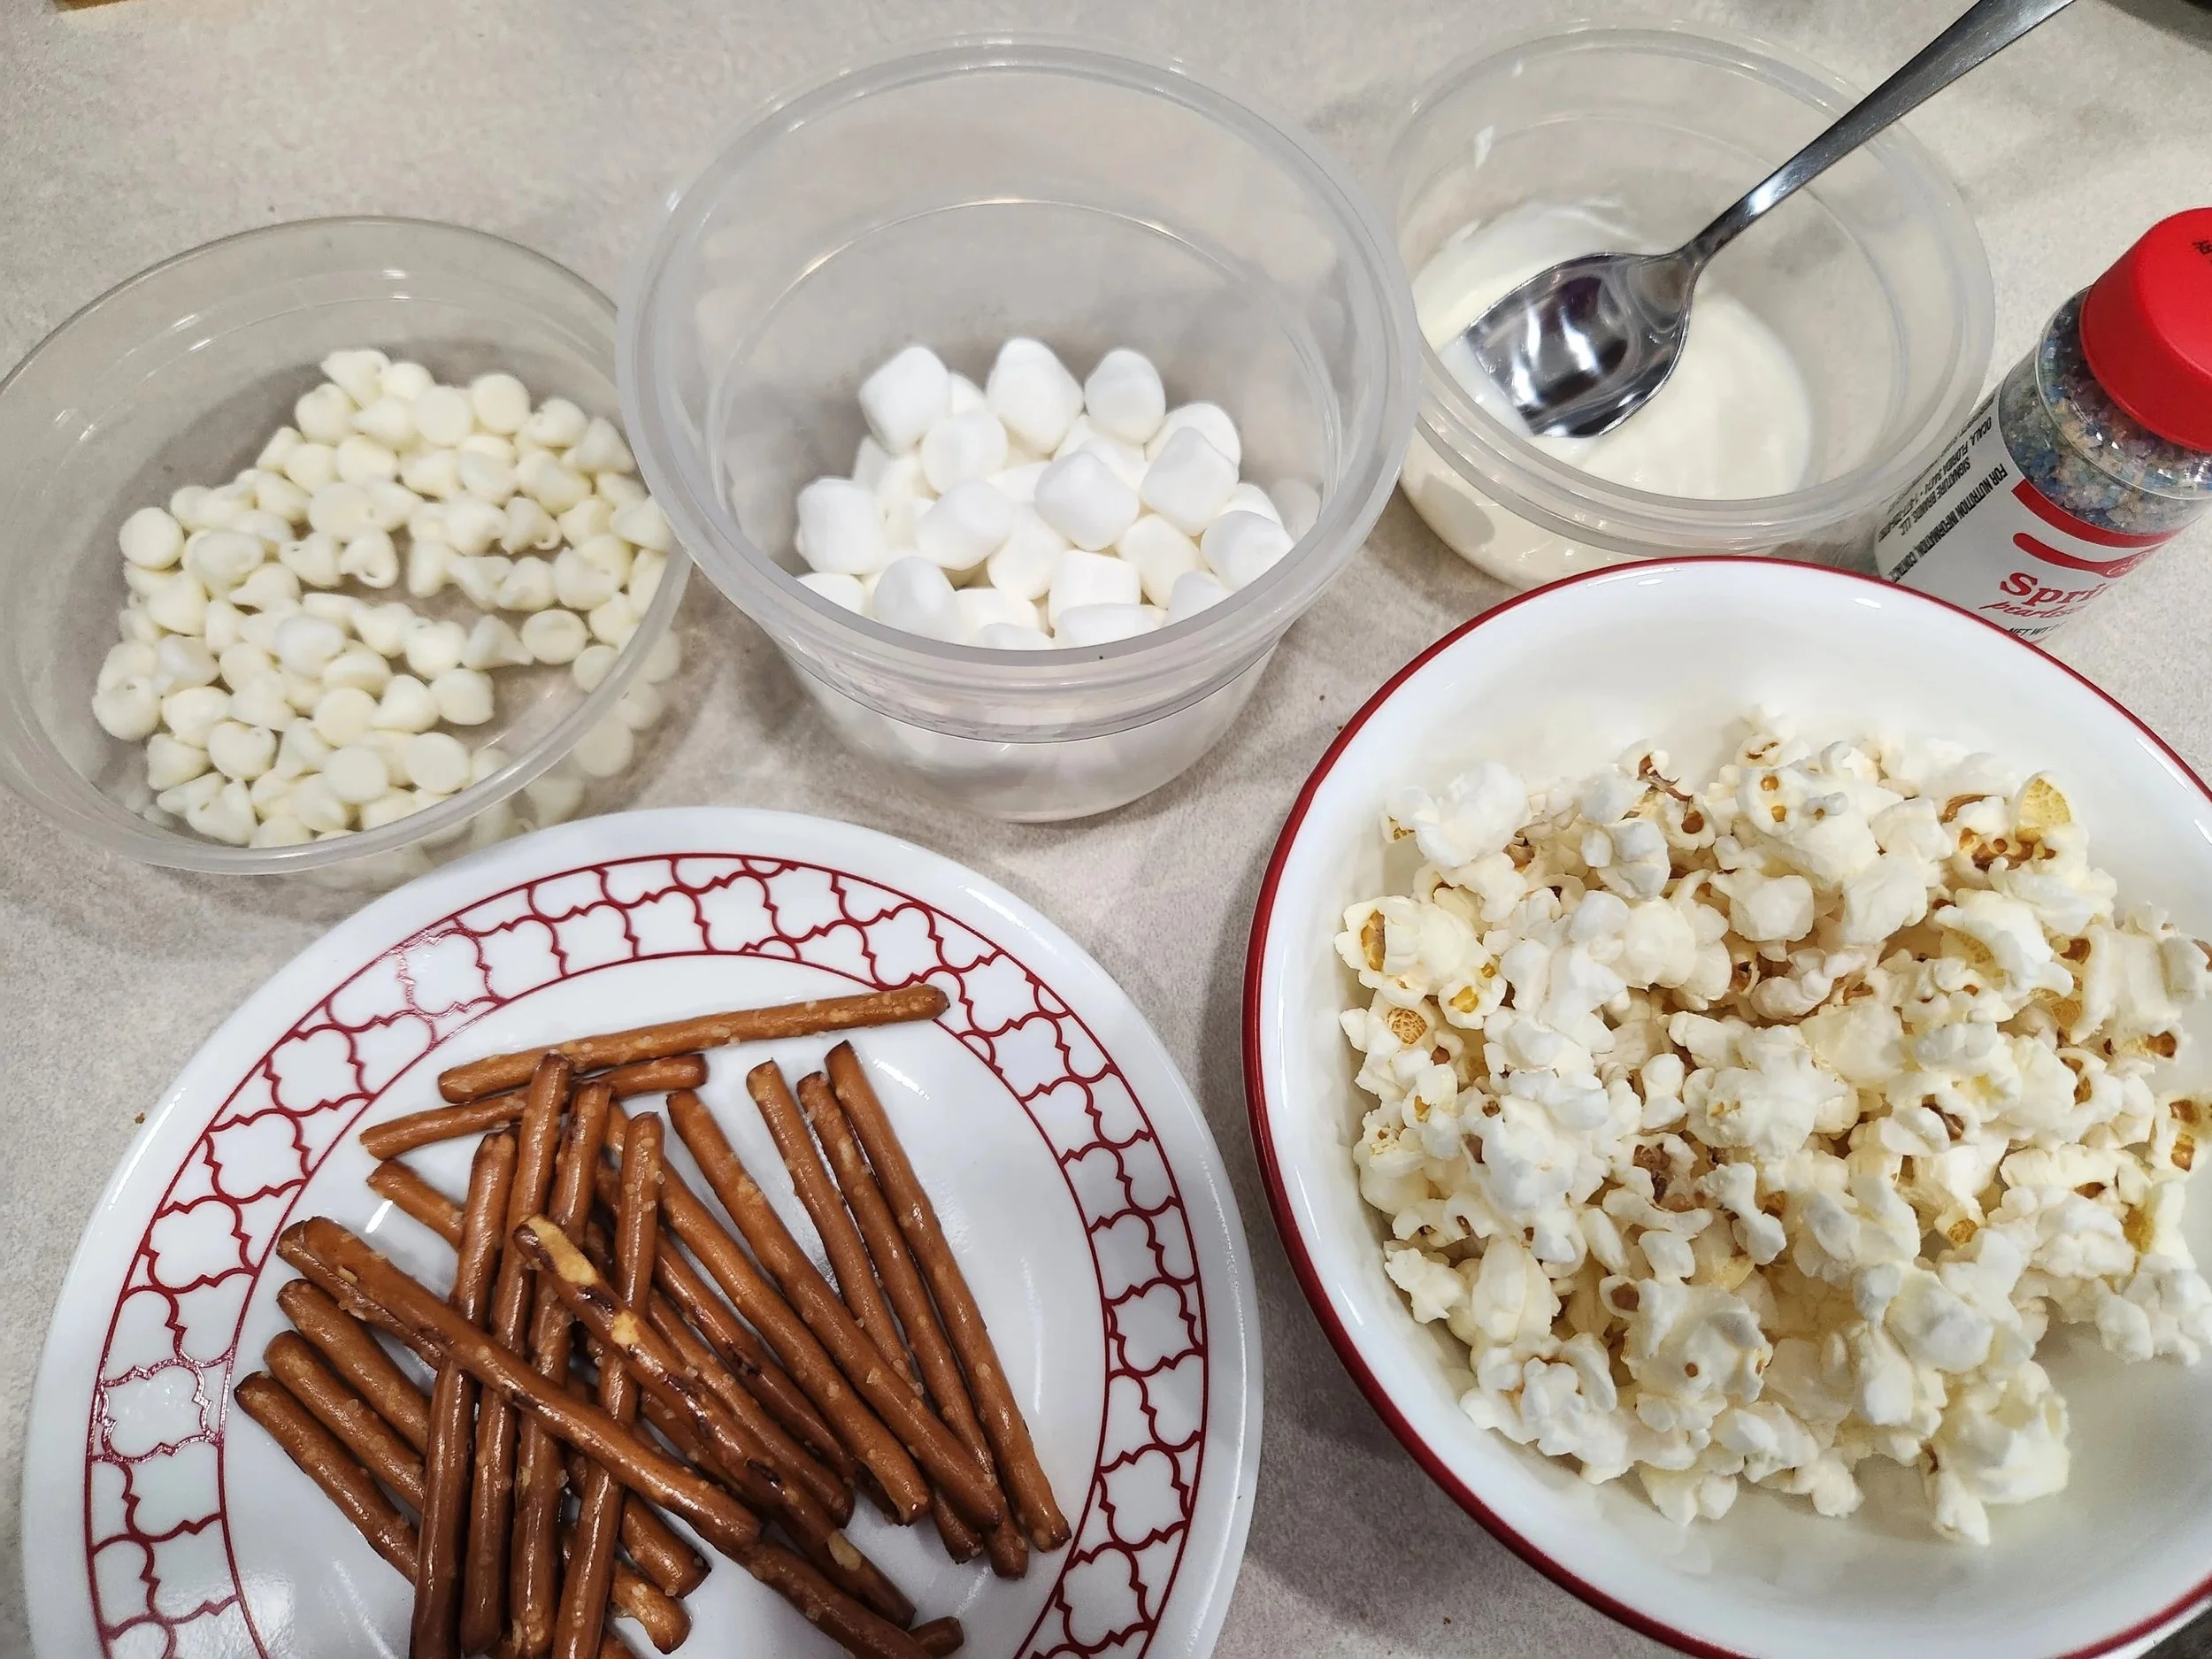
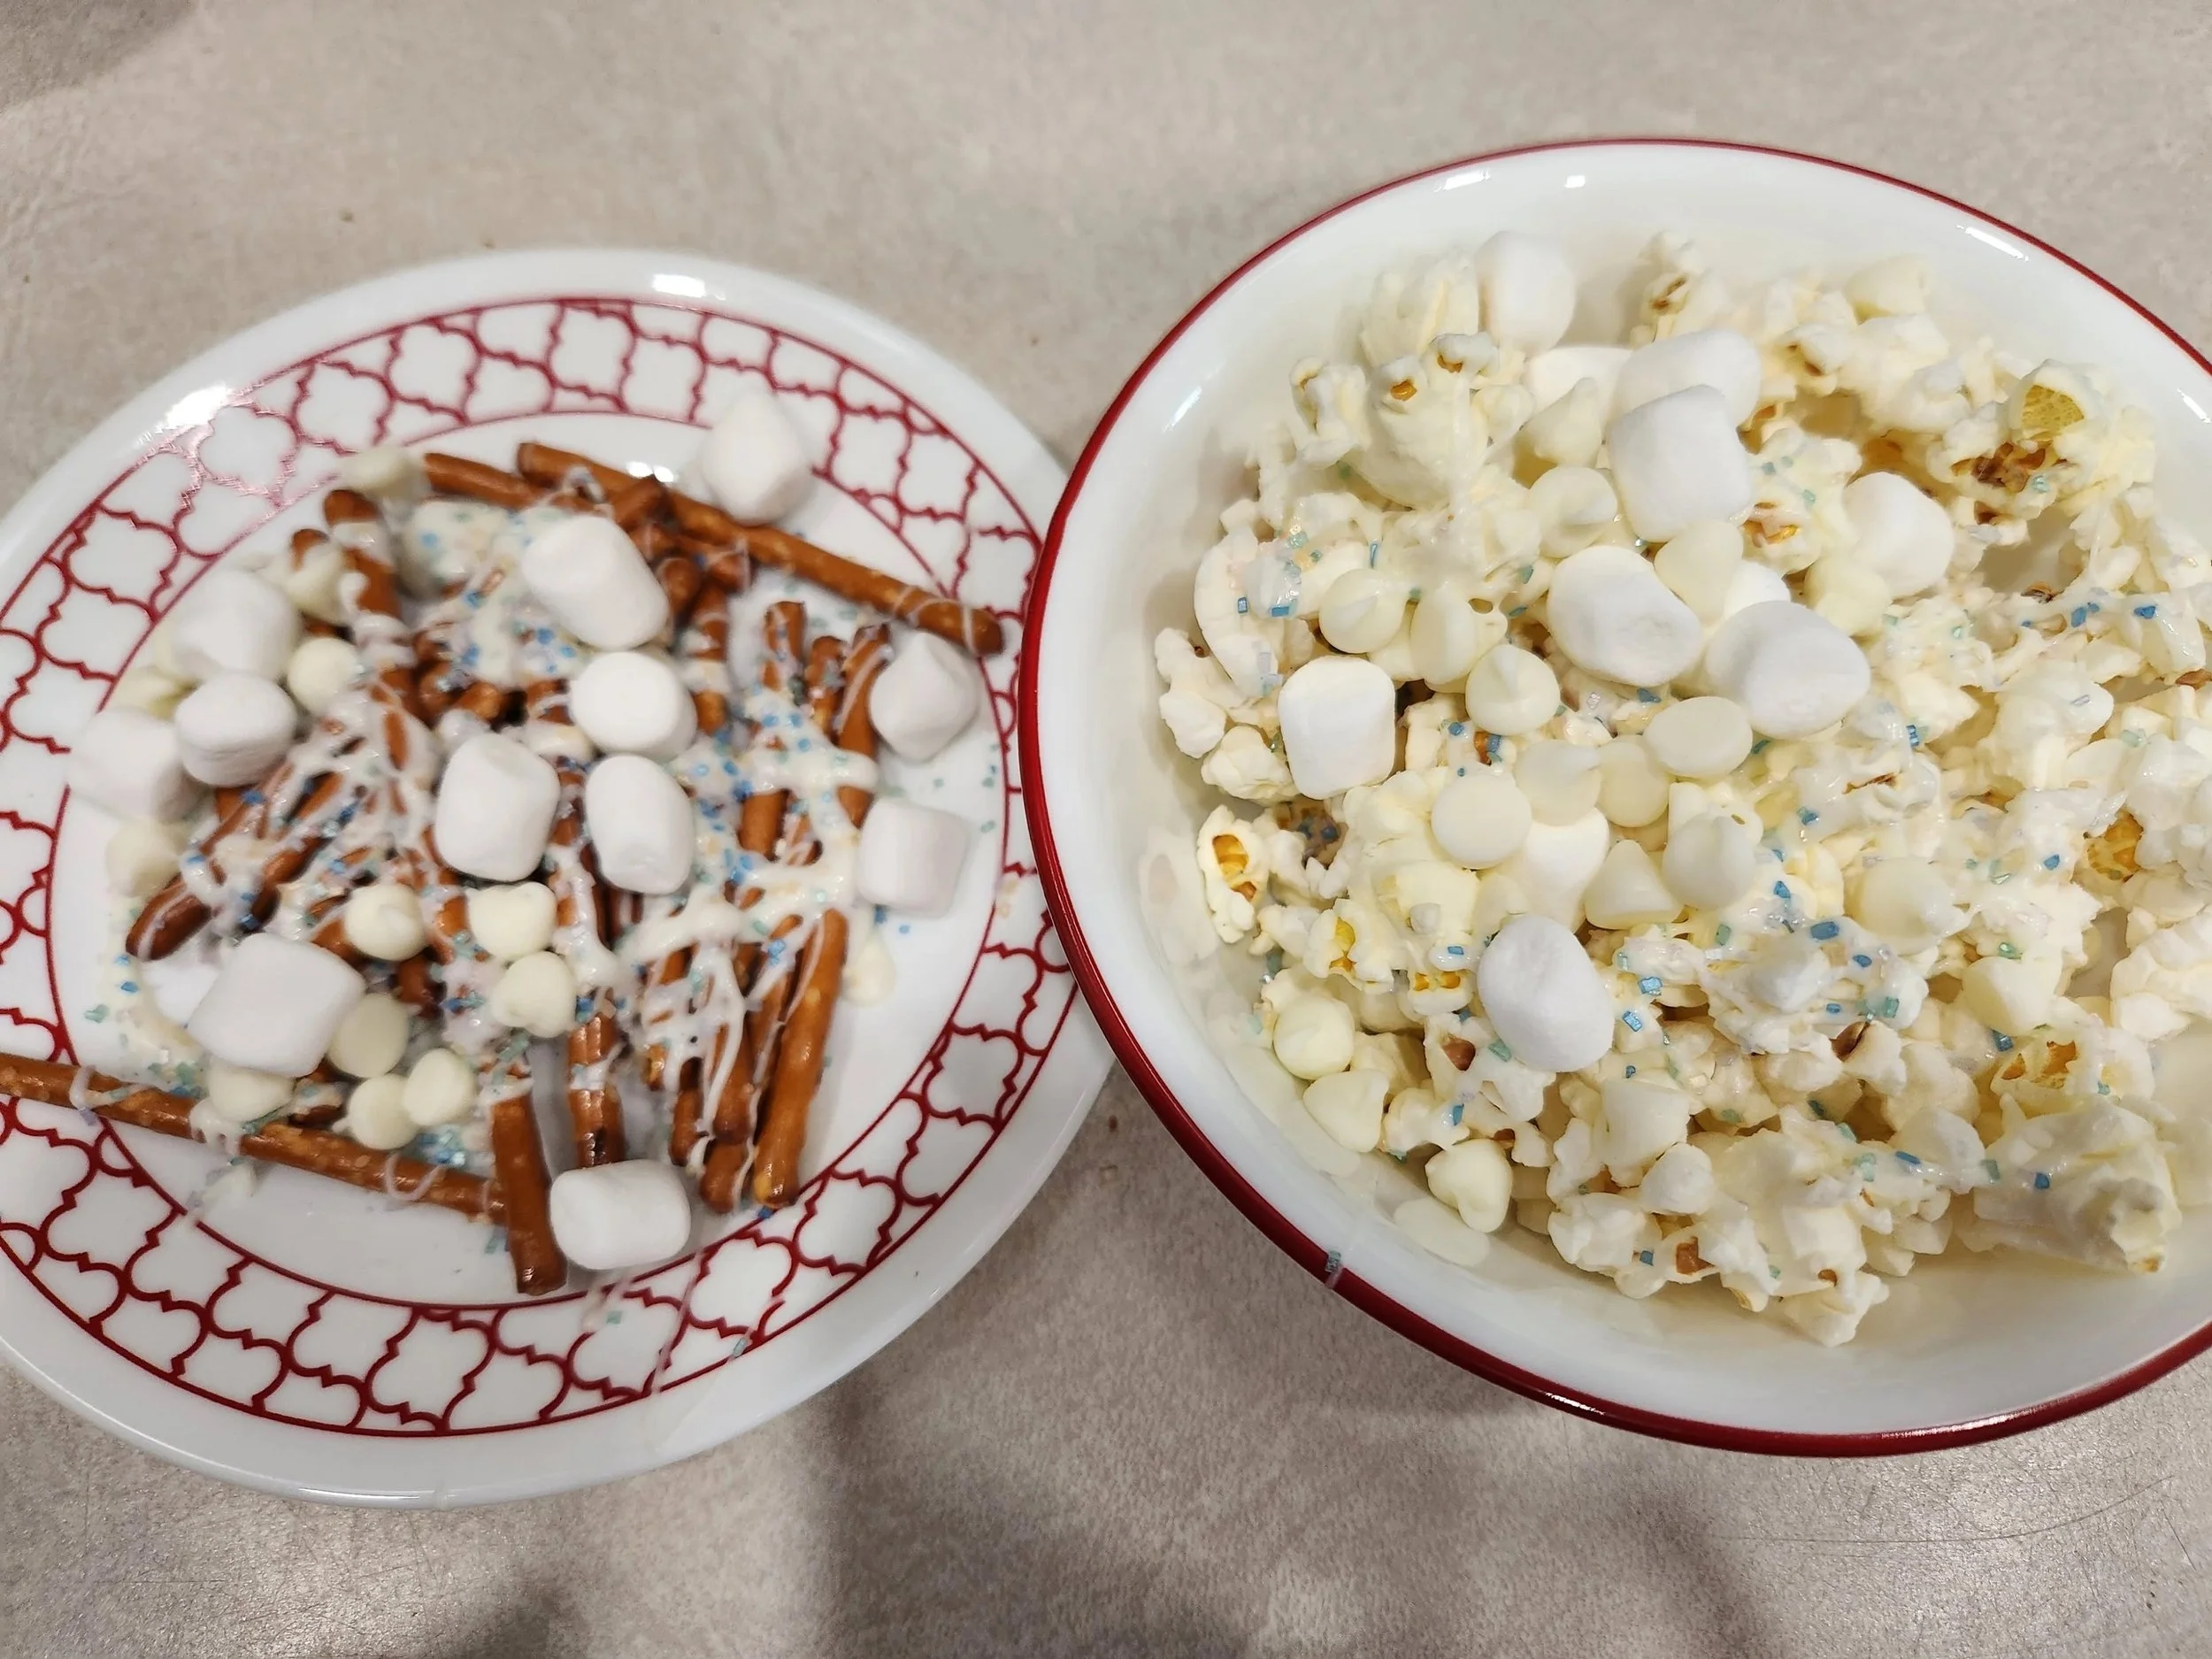
Supplies Needed:
Popcorn
White chocolate
Sprinkles
Mini Marshmellows
Have Little Ones Who Aren’t Ready for Popcorn?
Try pretzel sticks instead
Prep Time: About 5 minutes
Directions:
Pour the popcorn into bowls. Melt a small amount of white chocolate in the microwave for about 30 seconds, or until it’s easy to pour. Drizzle the melted chocolate over the popcorn, then top with mini marshmallows, sprinkles, and a few extra white chocolate chips to create a quick and easy snack mix that’s perfect for movie night.
My younger son isn’t quite ready to eat popcorn yet, so we made a second batch using pretzel sticks instead. It worked out great and still gave him a Frozen-themed snack he could enjoy alongside the rest of the family.
Our Experience:
This snack was a lot of fun to make with the kids. I set out all the toppings and let them sprinkle and pour whatever they wanted onto their snack mix. These were just the toppings we happened to have at home, so don’t worry if you don’t have this exact combination. You can use whatever you have on hand and it’ll work just as well.
My kids are picky eaters, and I’ve discovered they’re much more likely to try something if they help make it themselves. Because of that, I always look for ways to get them more involved in the kitchen. Not only did they have fun making their own snack mix, but they were also excited to sit down and enjoy it during our Frozen movie night.
Final Thoughts
One of the best parts of being a parent is creating these extra fun days for your kids and then getting to watch them enjoy all the activities, play the games, and make memories together. Not every activity may go exactly as planned, but sometimes that’s when the most fun happens.
I hope when my kids are older they remember days like this because they’re so fun for me to put together. Part of the reason why I created this blog was to help families enjoy all the magic that Disney has to offer, whether you’re at the parks or at home, and I hope your family has as much fun during your Frozen-themed Disney Day at Home as mine did.